Register to receive free access to all teacher materials.

l Projects
Programming Language
BirdBlox, Arduino
You can build many different types of robots with the Hummingbird kit. Some robots are stationary, and others move around their environment. A wheeled robot is called a mobile robot or a rover. This tutorial will show you how to build a simple rover and program it to drive autonomously (by itself) or via remote control.
Building a Simple Mobile Robot
This section will describe how to build a rover with a simple cardboard base. If you have a laser cutter, you can make this process a little easier. This file contains a template for a rover body. Cut this template from cardboard, and then follow these video instructions to assemble your rover. Then skip down to the sections on programming!
Materials
- Cardboard
- Ping-pong ball
- Rubber bands or zip ties
- Exacto knife
- Glue gun
- Small Phillips screwdriver
- Two gear motors
- Two wheels with O-rings and screws
- Terminal tool
- Distance sensor (optional)
- Hummingbird board
- Battery pack and batteries
- Hummingbird BLE adapter
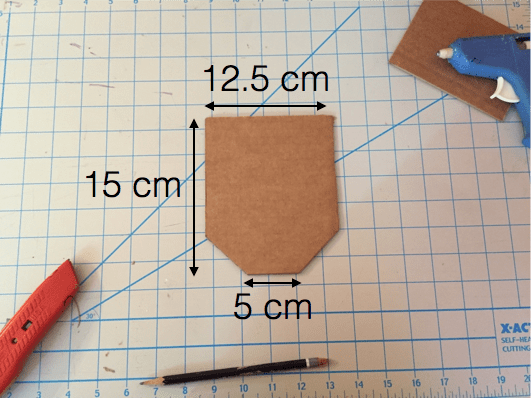
First, make a body for your robot from cardboard. Start with a rectangle approximately 12. 5 cm by 15 cm (5” by 6”). Cut away two of the corners to make an edge roughly 5 cm across.
 Use hot glue to attach two gear motors approximately 2.5 cm from the 12.5 cm edge.
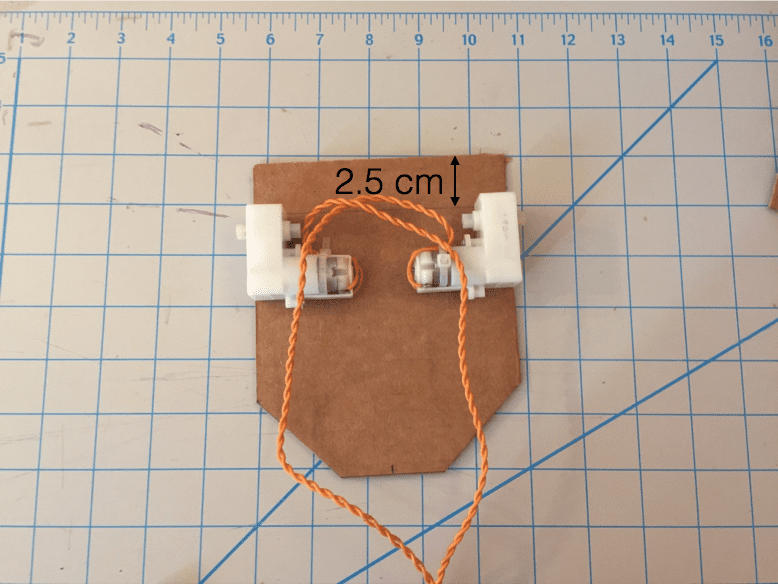
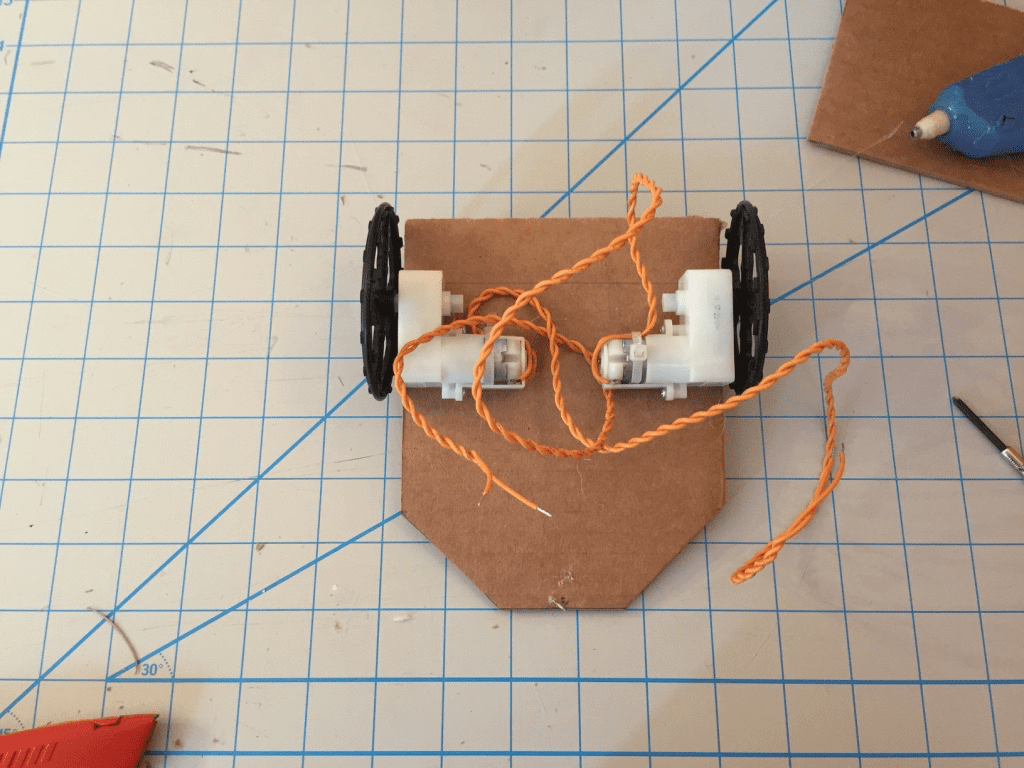
Use the screws included with your Hummingbird kit to attach a wheel to each gear motor. Each wheel comes with a rubber O-ring. Place this on the wheel to increase the traction of the wheels on the floor.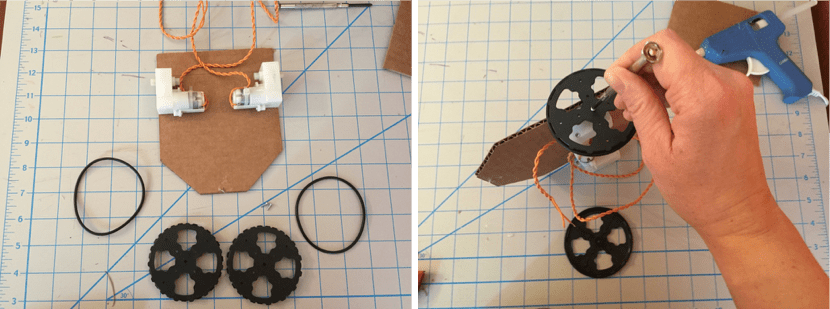
If you flip your robot over, you will notice that it can’t balance on two wheels. Use hot glue to attach a ping-pong ball in the middle of the short side of the base. This will make your robot more stable while still gliding smoothly along a surface so that your rover can move and turn.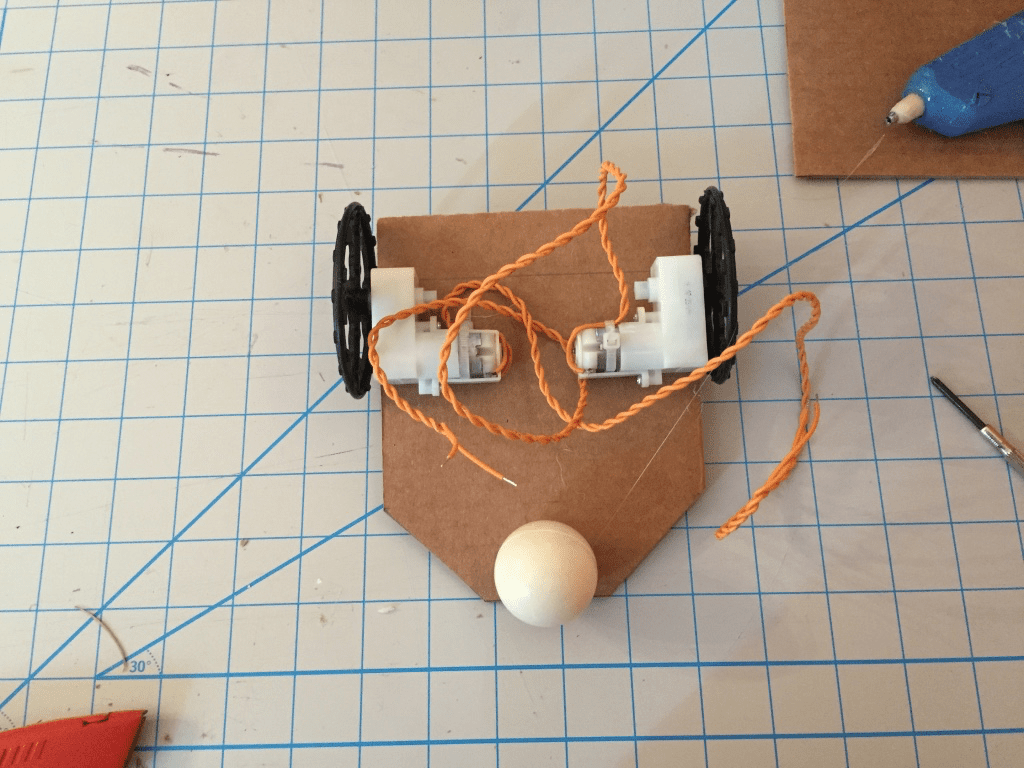
Flip your robot over. Place the Hummingbird board on top of it and connect the gear motors to the motor ports.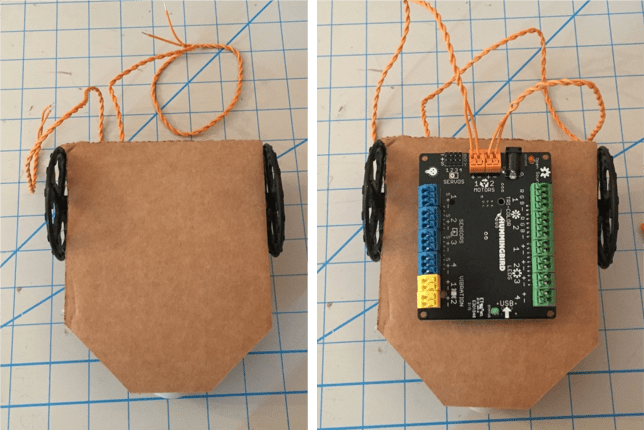
Attach the battery pack to the Hummingbird board. You can place it on top of the board.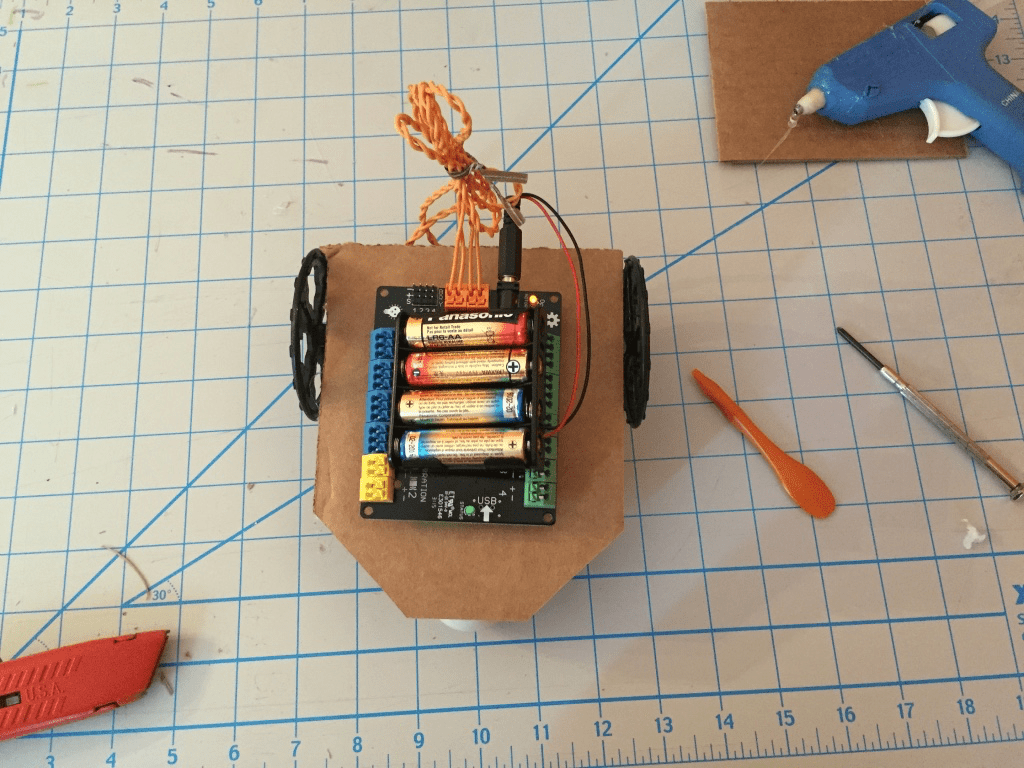
If you want your robot to be able to detect obstacles, attach a distance sensor at the front of the base between the gear motors. It is also a good idea to use rubber bands or zip ties to keep the board and battery pack in place, as well as to keep the wires out of the way.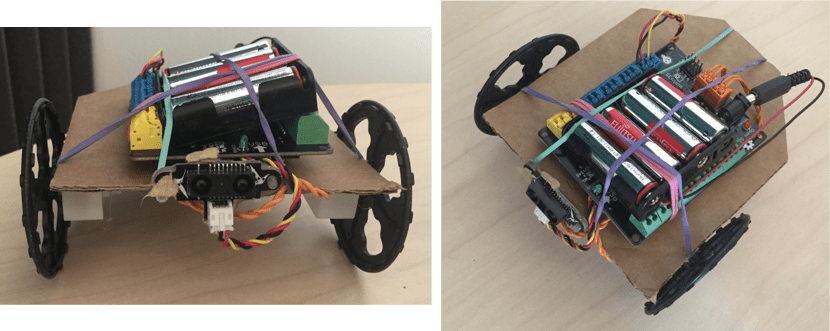
Programming a Remote Control Robot with BirdBlox for iPad
You can use the BirdBlox app to control your robot with an iPad! You can find details on installing and programming with BirdBlox here. To use BirdBlox, you will need a Hummingbird BLE adapter.
Start by determining which motor commands move your robot forward. For our robot, the Hummingbird Motor command must be negative for both motors to move the robot forward. You may find that one or both of your motors must be set to a positive number to make the robot move forward. This is fine; it just means that you chose ‘+’ and ‘-’ differently when you connected the motors to the board.
We want the robot to move forward when the iPad is tilted forward (in landscape mode). To do this, we can use an if else block within a forever loop. When the iPad is tilted, the accelerometer reading in the x direction is less than -0.5, and the robot moves forward. Otherwise, the robot stops.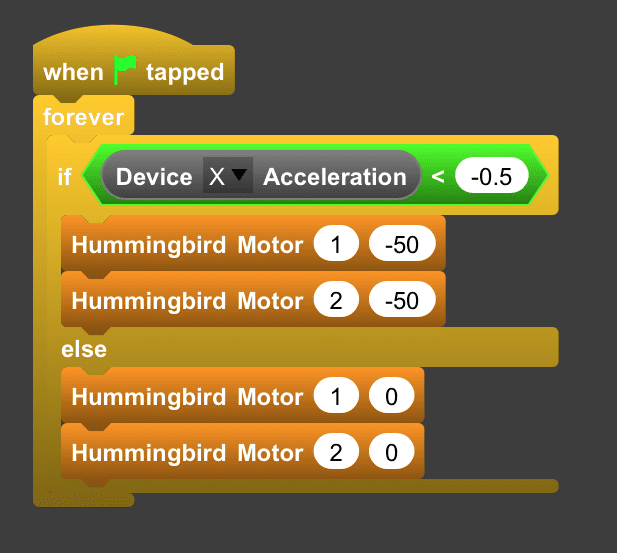
Next, we want the robot to move backward when the iPad is tilted in the opposite direction. We can do this by placing another if else block inside the first. If the x acceleration is not less than -0.5, we check whether it is greater than 0.5. If it is, the robot moves backward. If the x acceleration is greater than -0.5 but less than 0.5, then the robot stops.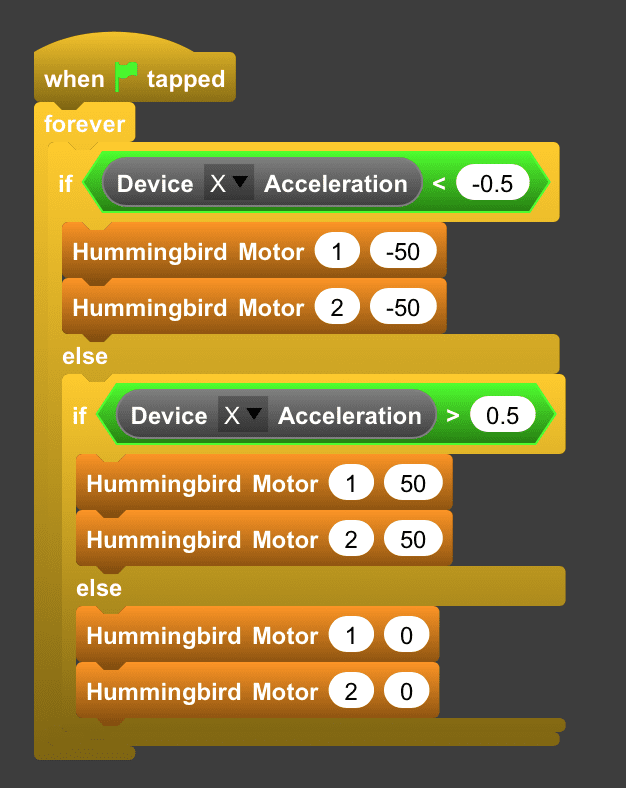
Next, we want the robot to turn left and right when we tilt the iPad to the left and right. We can do this using two more if else blocks that check the y acceleration. When the iPad tilts to the left, the robot turns left. When the iPad tilts to the right, the robot turns right.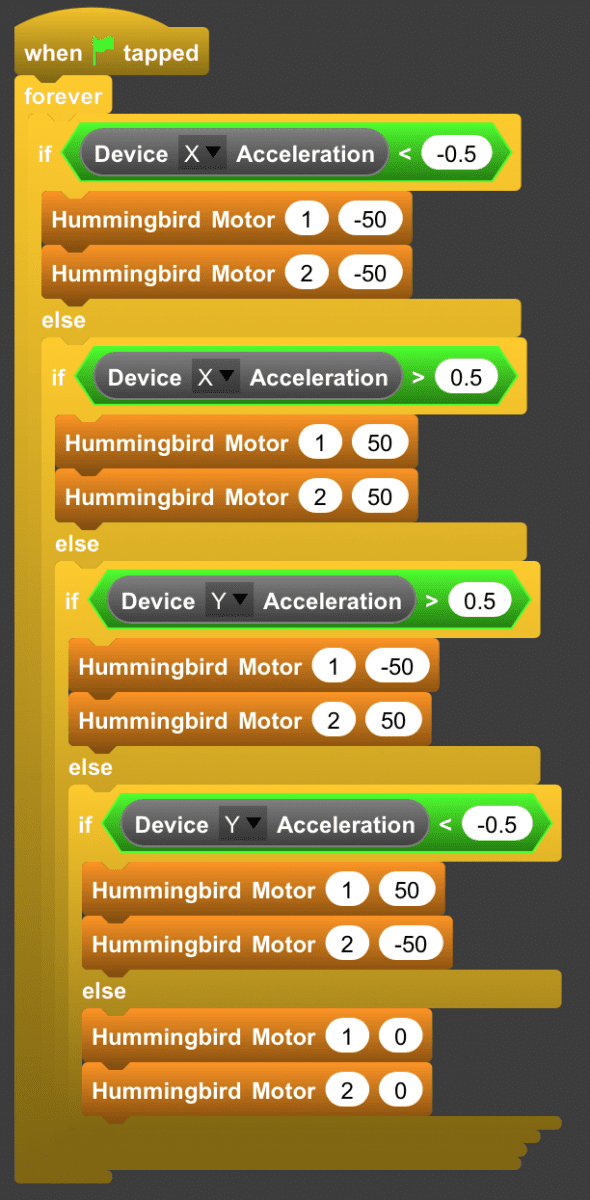
Programming an Autonomous Mobile Robot with BirdBlox
You can use the iPad to control the movement of the robot, as shown above, but you can also use BirdBlox to write a program to make it move autonomously. The program below uses the distance sensor to help the robot avoid obstacles. When the robot is more than 20 cm from an obstacle, it moves forward. Otherwise, it backs up and turns left.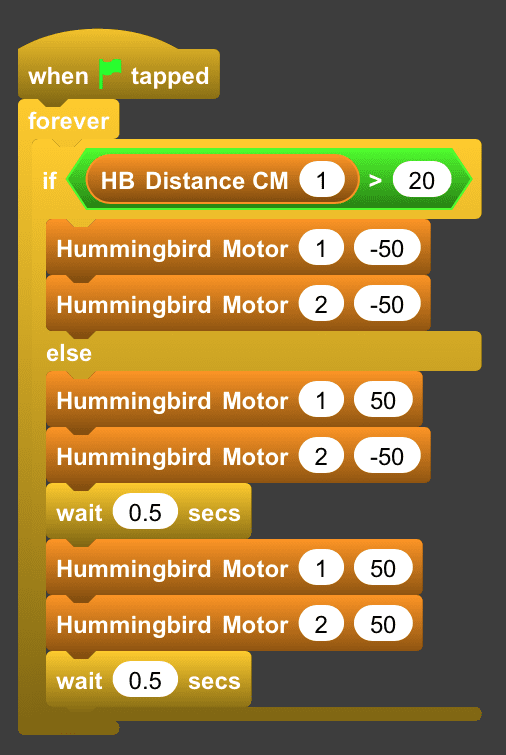
These building directions and programs will get you started with your robot, but you can go further! Improve the body of your rover, or write other programs to make it do new things!