Game Controller
Subjects
Math, Maker
Project Type
Interactive Games
Required Tutorials
Dial sensor
Estimated Time
Short (1-3 hours)
Description
Create a game controller using the Hummingbird!
Project Map
Learning Goals
Students will create a game controller using Hummingbird Bit dial sensors.
Materials
- Hummingbird Bit Premium Kit
- Cardboard
- Possible Craft supplies
Tips
- Have students work in groups of 2-3.
- Our Printables page has a variety of documents for making teaching and learning with Hummingbird easier. Visit and explore resources like the My First Robot Design Notebook now.
Steps
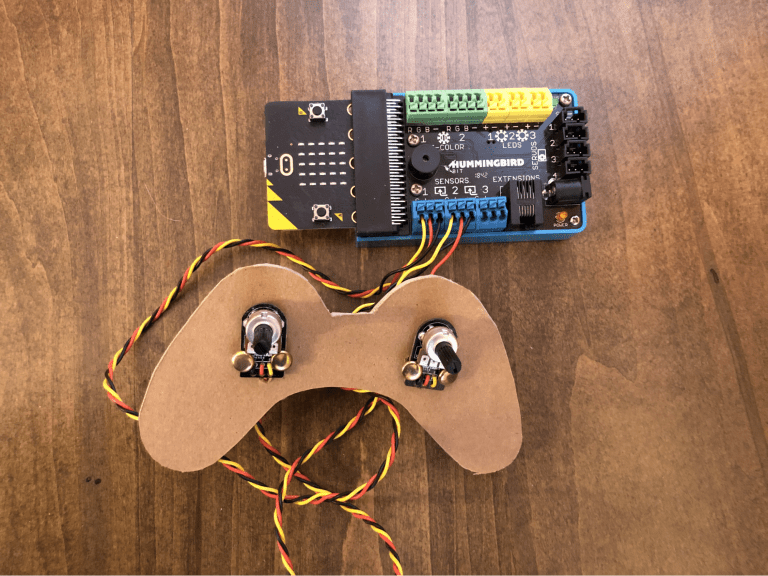
Snap! enables students to create physical devices with the Hummingbird that interact with programs that also display information on the computer screen. Students can be challenged to create their own video game, complete with controller! One example is shown here, but students will come up with many other creative ideas.
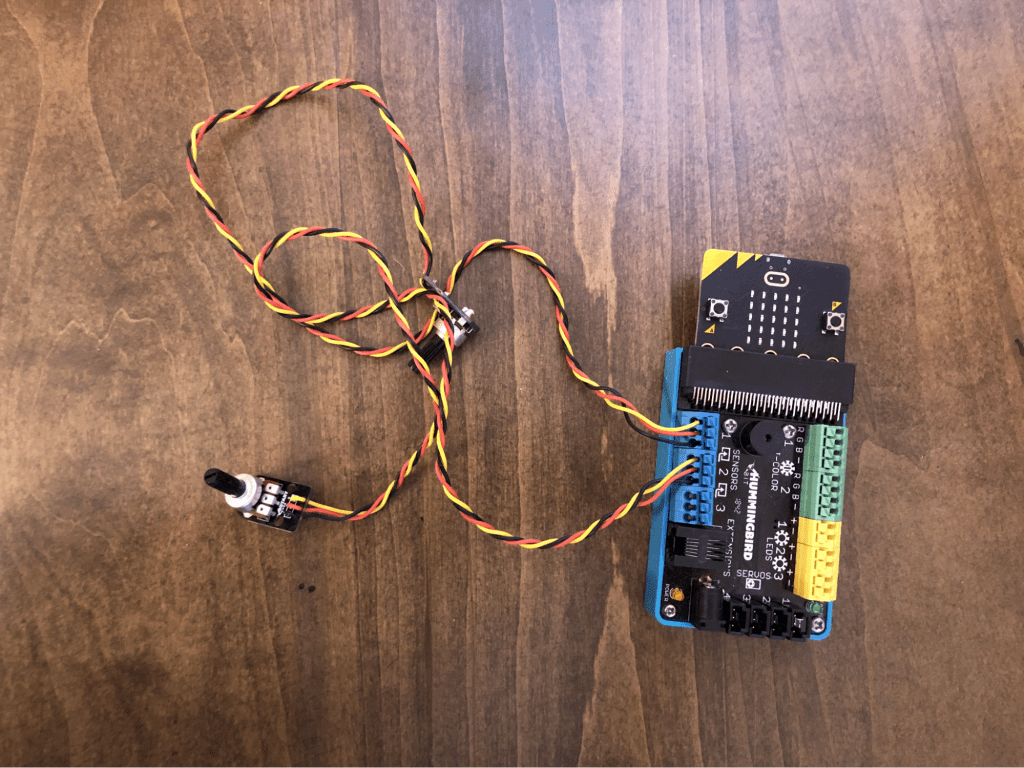
Start by connecting two dials to Hummingbird sensor ports 1 and 2.
If you want, you can build a cardboard controller to hold your dials. Metal brads are useful for attaching the dials to the cardboard, but make sure that the brads don’t touch on the backside of the cardboard.

Connect to the Hummingbird and open Snap!.
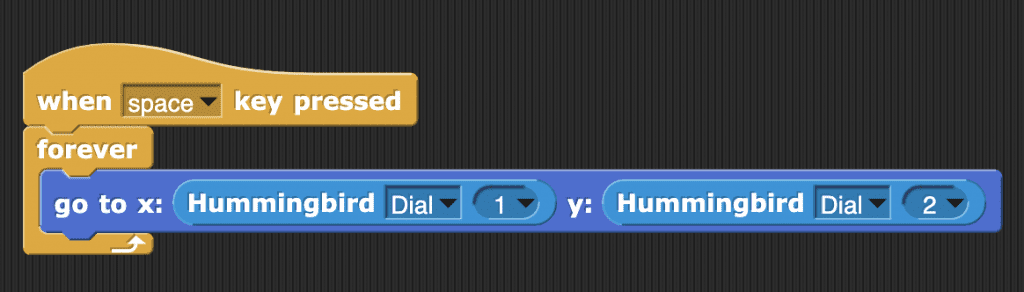
You will use the dials to move a sprite on the screen in Snap!. For this, you will use the go to block to continually send the sprite to a position on the screen determined by the dials. Try running this code and use the dials to move the sprite. How much of the screen can the sprite cover?
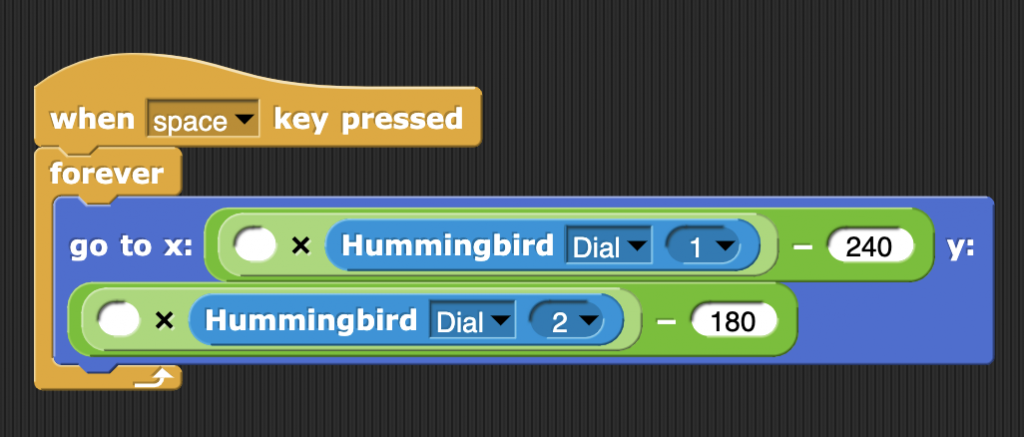
The stage in Snap! Is a coordinate grid that goes from -240 to 240 in the x-direction and -180 to 180 in the y-direction. You can use math blocks to make your sprite cover this whole area as you turn the dials. What numbers do you need to fill in the blanks so that your sprite can get to any point on the stage?
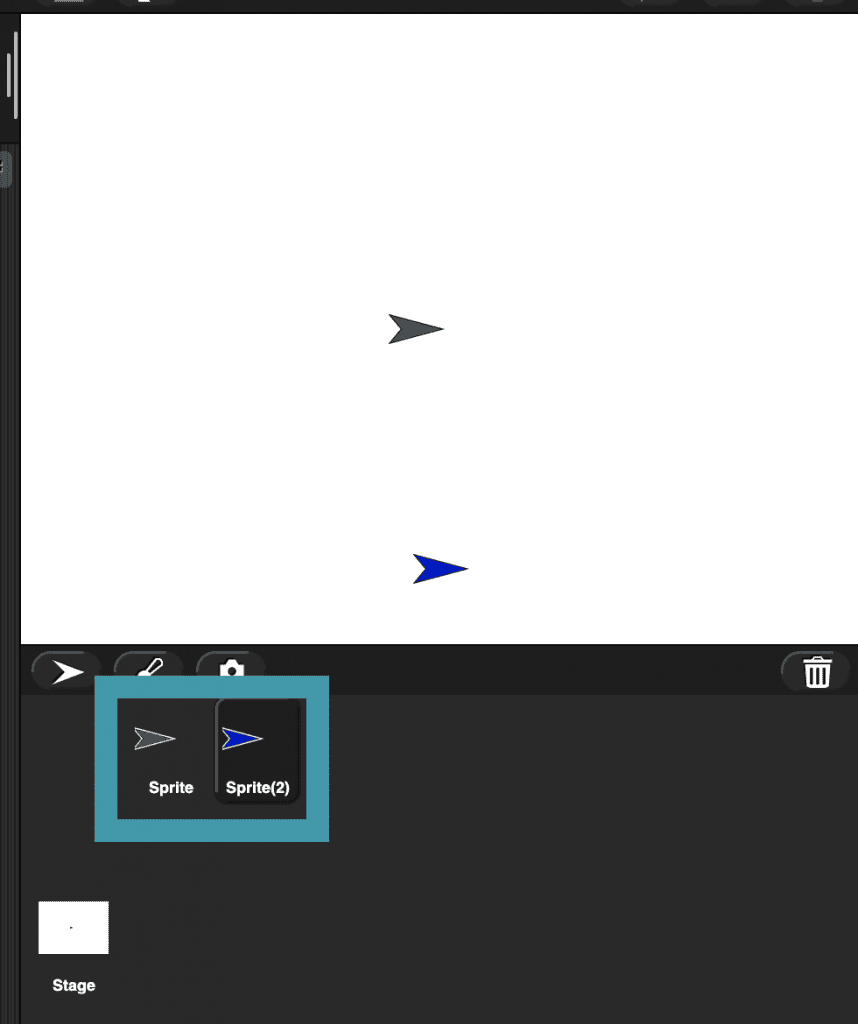
Now that you can use one sprite to move around the screen, let’s add another sprite. Click the new sprite button at the bottom left of the stage to add a new sprite.
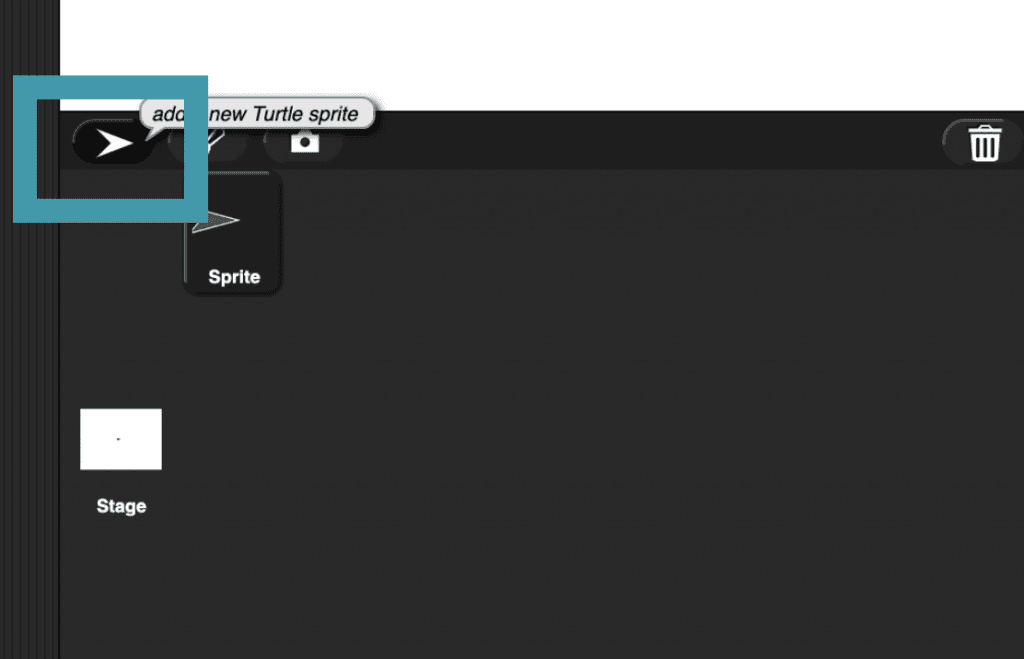
Now you have a new sprite and a new scripts area to write scripts for that sprite. To see the scripts for a given sprite, just select that sprite below the stage.
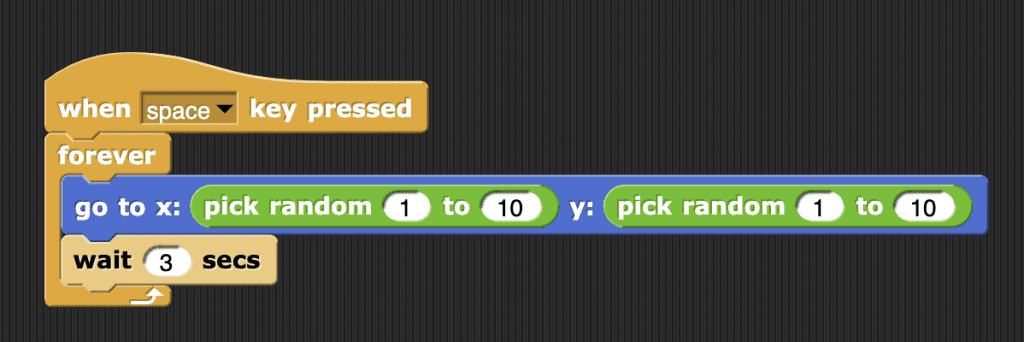
Program the second sprite to move to a random position every three seconds. What numbers should go in the pick random blocks?
Now you have a very simple game! You have a sprite that moves randomly around the screen, and you can chase it using the sprite controlled by the dials. Now it is time to make the game your own!
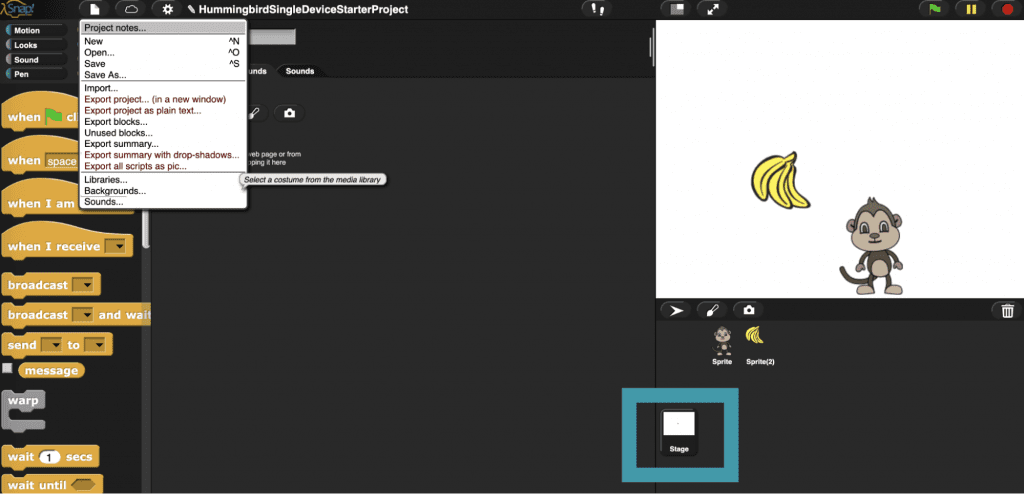
One way to make your game more fun is to upgrade your sprites. Go to File/Costumes to see the sprite costume that are available.
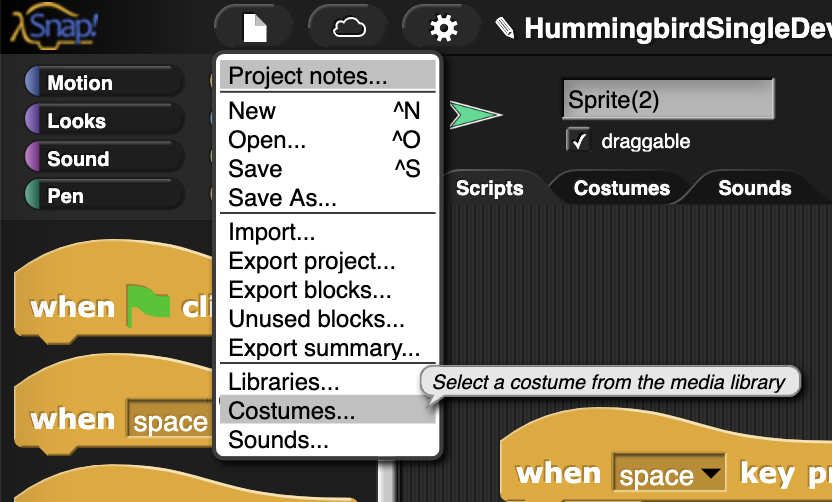
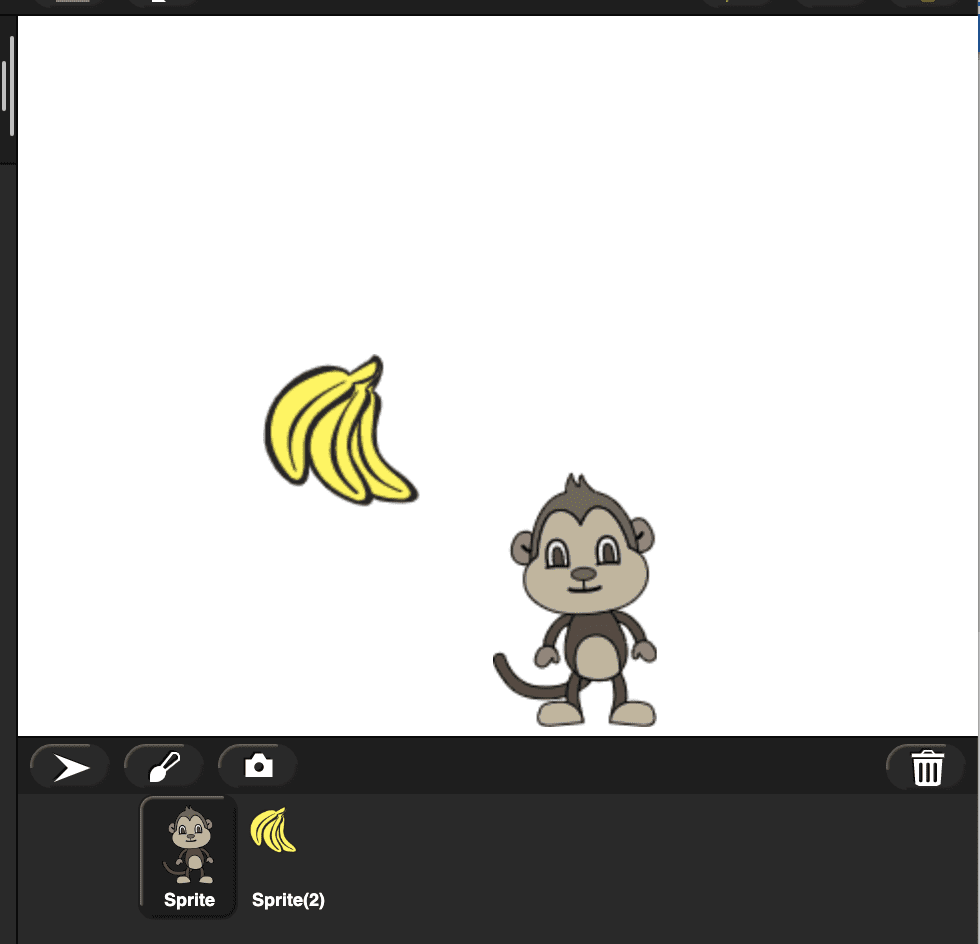
For each sprite, choose a costume you like and click Import. As an example, you could make the randomly moving sprite a bunch of bananas and the dial-controlled sprite a monkey that chases the bananas.
To customize the background of your game, click on the stage icon and then go to File/Backgrounds.
You can also draw your own sprite costumes or backgrounds or upload your own pictures to customize your game!
Once you have customized how your game looks, what can you add to the code to make it better? Maybe you want to keep score and add LEDs to your game controller that flash when the user scores a point. Maybe you want to add a “villain” to the game that the user has to avoid. The possibilities are endless!
Standards Alignment
This project is aligned with Common Core math standards that involve arithmetic and algebraic expressions (5.OA.A, 6.EE.A, and 7.EE.B); proportions (6.RP.A and 7.RP.A); and the coordinate grid (5.G.A and 6.NS.C). In addition, this project aligns with the Next Generation Science Standards for engineering at all grade levels (3-5-ETSI-1, 3-5-ETSI-2, 3-5-ETSI-3, MS-ETSI-1, MS-ETSI-2, MS-ETSI-3, MS-ETS1-4, and HS-ETSI-2).
Photo Gallery