Lesson 6 – Buzzer + Putting It All Together

Hummingbird Components

2 LEDs (Single Color or Tri-color), 1 Position Servo, 1 Rotation Servo

Java Concepts

None

Teacher Materials

Get Access

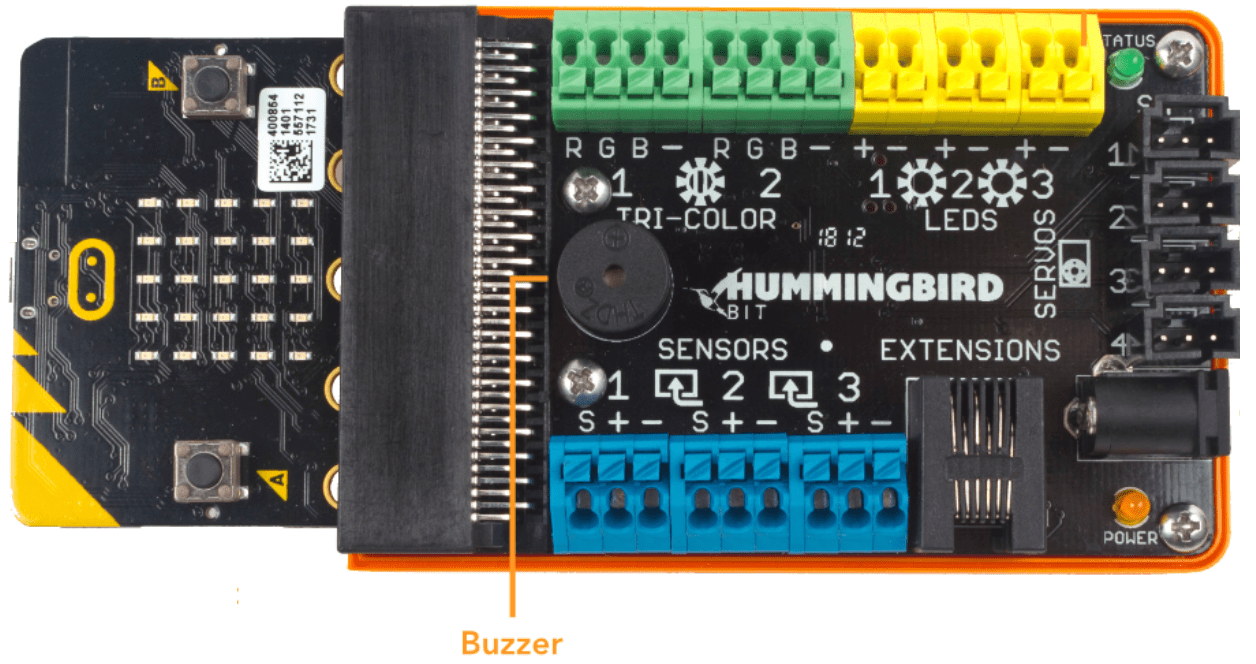
In the previous lessons, you have learned to use the Hummingbird lights and motors, as well as the micro:bit display. These are known as the outputs. Python sends commands to these components to make something happen. There is one more output, the buzzer on the Hummingbird board. In this lesson, you will learn to play simple songs using the buzzer. You will also complete a challenge with all of the Hummingbird components you have used so far. This will help you to review all of the Hummingbird outputs so that you are ready to move on to inputs (sensors) in the next lesson.

Use the playNote() function to play a note using the buzzer on the Hummingbird Bit. The method requires an integer representing the note (32-135) and a number giving the number of beats (0-16). The note number is the MIDI number for a particular musical note. For example, middle C is 60. This website may be helpful in matching note numbers to names. The number of beats can be a decimal number. A beat is roughly equal to one second.

Exercise 1

Try out this sample code, and then modify it to play three different notes.

Exercise 2

What is the difference between Example 1 and Example 2? Make a hypothesis, and then test it out.

Exercise 3

Write a program to play a song. For some songs to try, see this website (if you read music) or this one (if you don’t).

Exercise 4

Now it is time to put all the things you have learned together! Create a display of lights and movement set to music. Your project should include the following:

  • At least two LEDs
  • At least one position servo
  • At least one rotation servo
  • A song played with the buzzer
Back to Top