Squishy Circuits
Subjects
Science, Maker
Project Type
Engineering & Inventions
Required Tutorials
Rotation servo
Estimated Time
Medium (3-6 hours)
Description
Learn how to make Squishy Circuits using playdough and the Hummingbird.
Project Map
Learning Goals
Students will learn about circuits using the Hummingbird Robotics Kit and Squishy Circuits.
Materials
- Hummingbird Bit Premium Kit
- Squishy Circuits
- Possible Craft supplies
Tips
- Have students work in groups of 2-3.
- Our Printables page has a variety of documents for making teaching and learning with Hummingbird easier. Visit and explore resources like the My First Robot Design Notebook now.
Steps
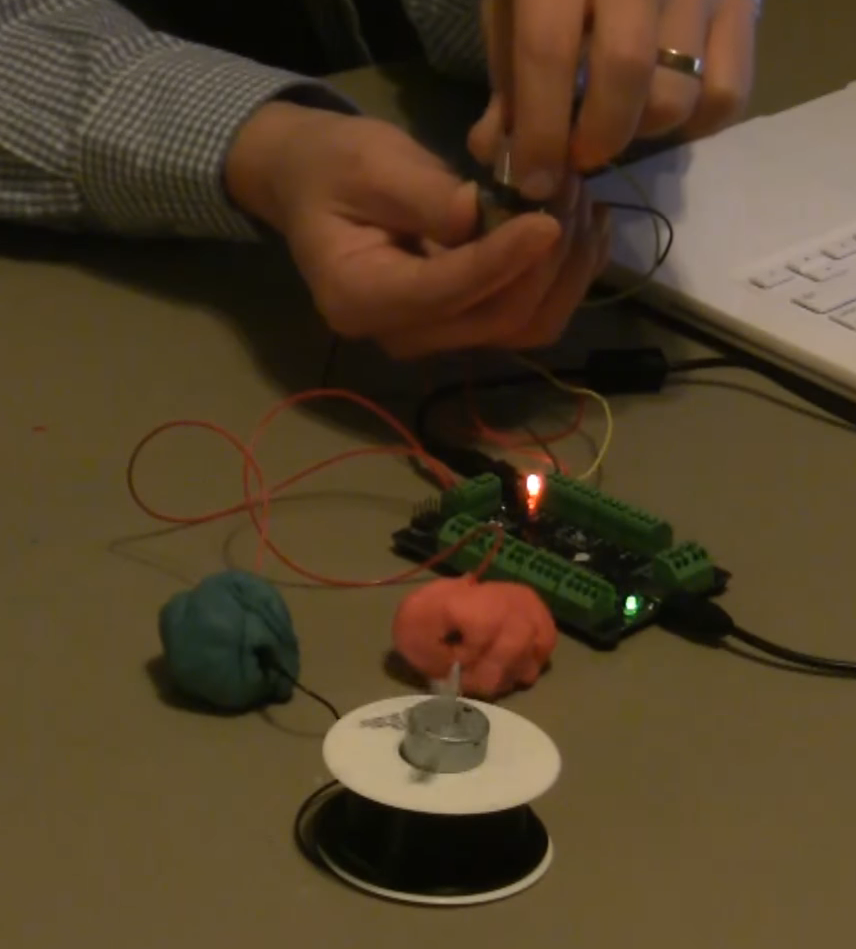
Squishy circuits are circuits made of conductive playdough. Watch the tutorial for an introduction to using Squishy Circuits with Hummingbird or jump past it for a quick reference on connecting items from the Squishy Circuits Kit to the Hummingbird.
Connecting LEDs
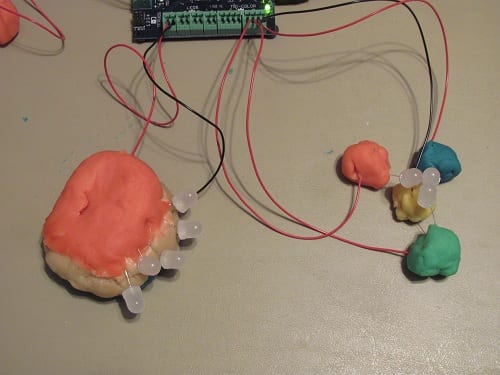
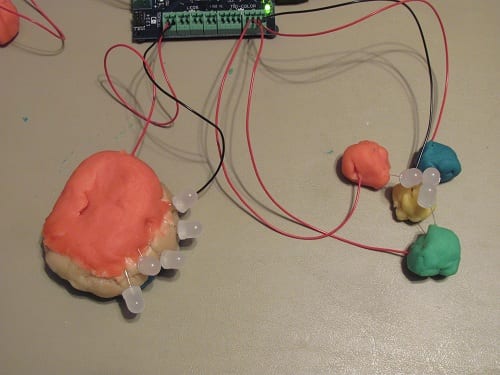
You can connect multiple LEDs to a single Hummingbird LED port through conductive playdough. The image to the right demonstrates two ways of connecting LEDs to the Hummingbird. On the left side five LEDs are pressed into a conductive dough sandwich – two disks of conductive dough with insulating dough in between them. The red top disk of dough is connected to the ‘+’ terminal of Hummingbird’s LED port 1. The bottom disk is connected through a black wire to the ‘-‘, or ground, terminal of LED port 1. The LEDs are inserted into the sandwich with the long leg of the LED in the red top disk and the short leg into the bottom disk. In general, you can safely hook up any number of LEDs to a single LED port, but each additional LED will make all LEDs a bit less bright. The LED circuit on the right shows three LEDs hooked up to tri-color LED port 2. A red LED is connected to the ‘R’ terminal, a green LED is connected to the ‘G’ terminal, and a blue LED is connected to ‘B’. The short legs of all three LEDs are inserted into yellow conductive playdough, which is connected through a black wire to the ‘-‘ terminal. This setup allows you to individually control each LED.
Connecting Motors
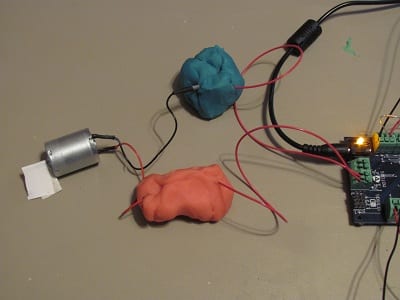
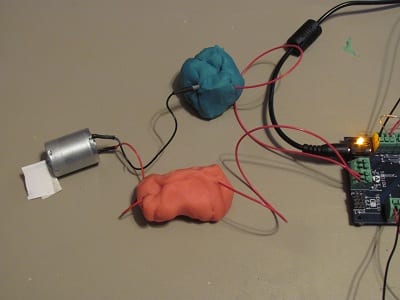
Connecting a motor with squishy circuits is very similar to connecting a regular motor to Hummingbird. In the picture on the right a motor is connected through two pieces of conductive playdough. The motor’s black wire is connected to blue playdough which is connected with a red wire to motor port 1’s ‘-‘ terminal. The motor’s red wire is connected to red playdough which is connected with a red wire to motor port 1’s ‘+’ terminal. Unlike the LEDs, the motor will spin if you reverse how it is connected (black wire to red playdough, red wire to blue playdough); it will just spin in the opposite direction. Warning: When connecting the playdough, make sure not to accidentally connect the two red wires coming from the motor terminals. To be completely safe, you should hook up this circuit with the Hummingbird’s motor power supply disconnected; just connect power as soon as you’ve hooked everything else up.
Connecting a Buzzer
We’ve found that we can control the piezo-electric buzzer in the Squishy Circuits kit with the Hummingbird’s vibration motor port. To do so, create two blobs conductive dough, put the red wire from the buzzer into one, and hook this blob up to the vibration motor’s ‘+’ terminal. Put the black wire from the buzzer into the other blob and hook it up to the vibration motor’s ‘-‘ terminal. We’ve found that you need to power the port to at least 60% before the buzzer turns on.
Connecting a Playdough Sensor
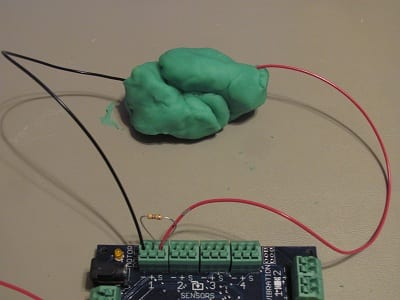
Did you know that you can use conductive dough as a sensor? You can sense whether someone is pulling a ball of dough apart, twisting it, or squishing it together. To create a playdough sensor, take a single ball of dough and stick a black wire and a red wire into opposite ends of the dough. Connect the black wire to a sensor port’s ‘-‘ terminal. Connect the red wire to the ‘S’ terminal (not the ‘+’ terminal). Now take a 470 ohm through-hole resistor, and push one lead of the resistor into the ‘+’ terminal of the sensor port. Put the other lead of the resistor into the ‘S’ terminal; there is enough space in the terminal for both the red wire and the resistor’s lead. The sensor will probably register a value of between 10 and 30 (in Snap!), pulling the playdough or twisting it will raise the sensor value, breaking it apart will bring it close to 100 (in Snap!), and pushing it together will lower it.
More Information
Learn much more about Squishy circuits at the project’s homepage, or buy a kit at the Squishy Circuits Store. Finally, watch Dr. AnnMarie Thomas’ very fun TED talk on Squishy Circuits:
Standards Alignment
COMPUTER SCIENCE TEACHERS’ ASSOCIATION (CSTA)
CSTA Standards are split into different grade levels: 3-5, 6-8, and 9-10. Working with the Hummingbird Robotics Kit meets multiple standards across these grade-level delegations.
Visit this page for a more detailed explanation of how working with the Hummingbird Robotics Kit applies to meeting CSTA Standards.

