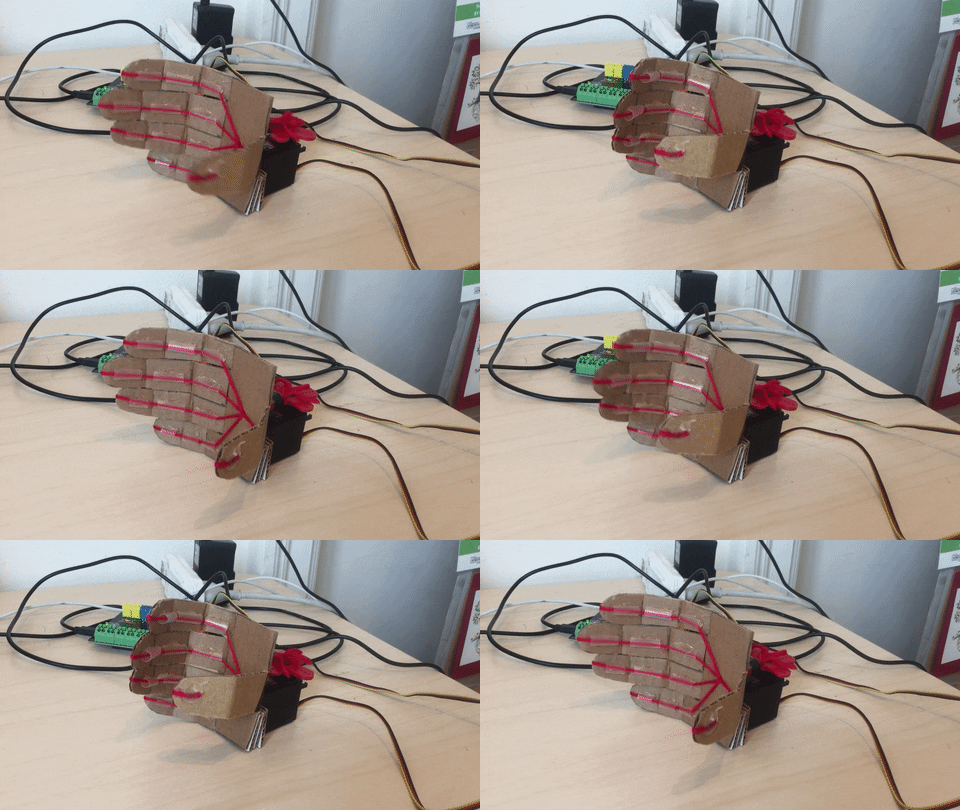
Making a Robot Hand with Hummingbird
Subjects
Maker, Science
Project Type
Real World Models
Required Tutorials
Position servo
Estimated Time
Medium (3-6 hours)
Description
Learn how to make a robotic hand with the Hummingbird.
Project Map
Learning Goals
Students will make a robotic hand with the Hummingbird Robotics Kit.
Materials
- Hummingbird Bit Premium Kit
- Cardboard
- Possible Craft supplies
Tips
- Have students work in groups of 2-3.
- Our Printables page has a variety of documents for making teaching and learning with Hummingbird easier. Visit and explore resources like the My First Robot Design Notebook now.
Steps
You can use the servo motor for more than just rotating something from 0° to 180°! This tutorial will show you how to use cardboard, straws, and yarn to create a robot hand. Then you will use a servo motor to pull on the yarn so that the fingers bend. The first part of this tutorial was based on this one by Orlando Martinez.
Start by cutting a hand shape out of cardboard. To be able to grasp an object, the thumb will need to be across from the fingers (in opposition). Look at the shape of your hand as you grasp a cup; this is the shape your robot hand will mimic.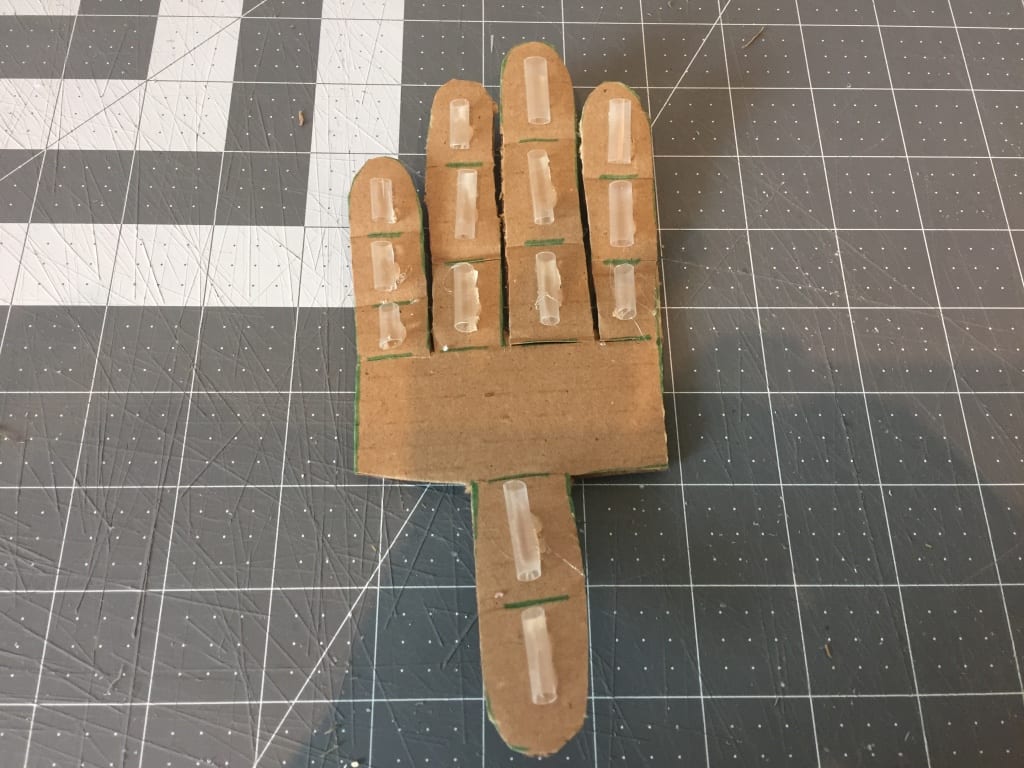
Draw a line at each of the joints where your fingers and thumb bend. Score these lines with an exacto knife, but don’t cut all the way through the cardboard. Scoring the joints will make it easier to bend the fingers and thumb.
Cut a drinking straw into small pieces, and hot glue one piece along each segment of the fingers and thumb. Then use a needle to run yarn along each finger. Poke a hole in the center of the hand and thread the yarn through to the back.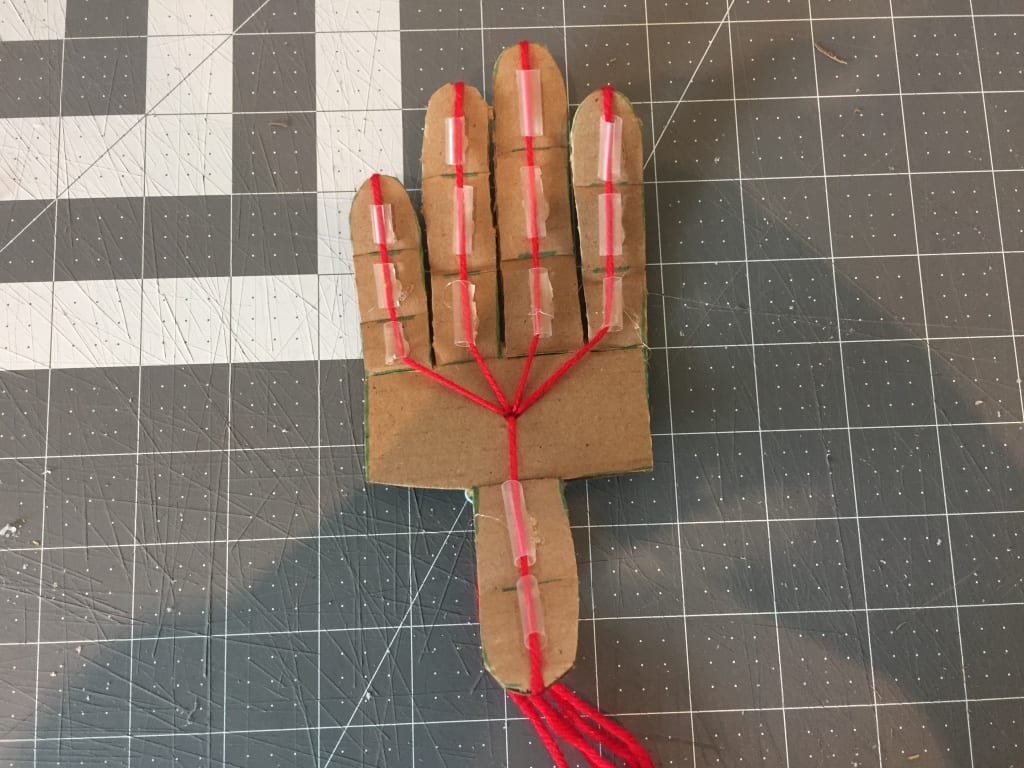
Hot glue the end of each piece of yarn to the back of the corresponding finger. Now try pulling on the unattached ends of the yarn to see the fingers and thumb bend!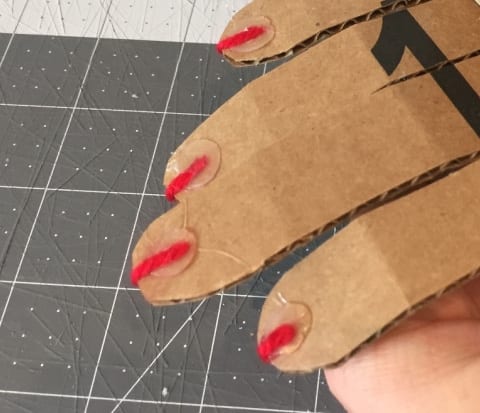
Use a screwdriver to replace the white circle on the servo with the red cross. Cut three small squares from cardboard (roughly 3 cm by 3 cm).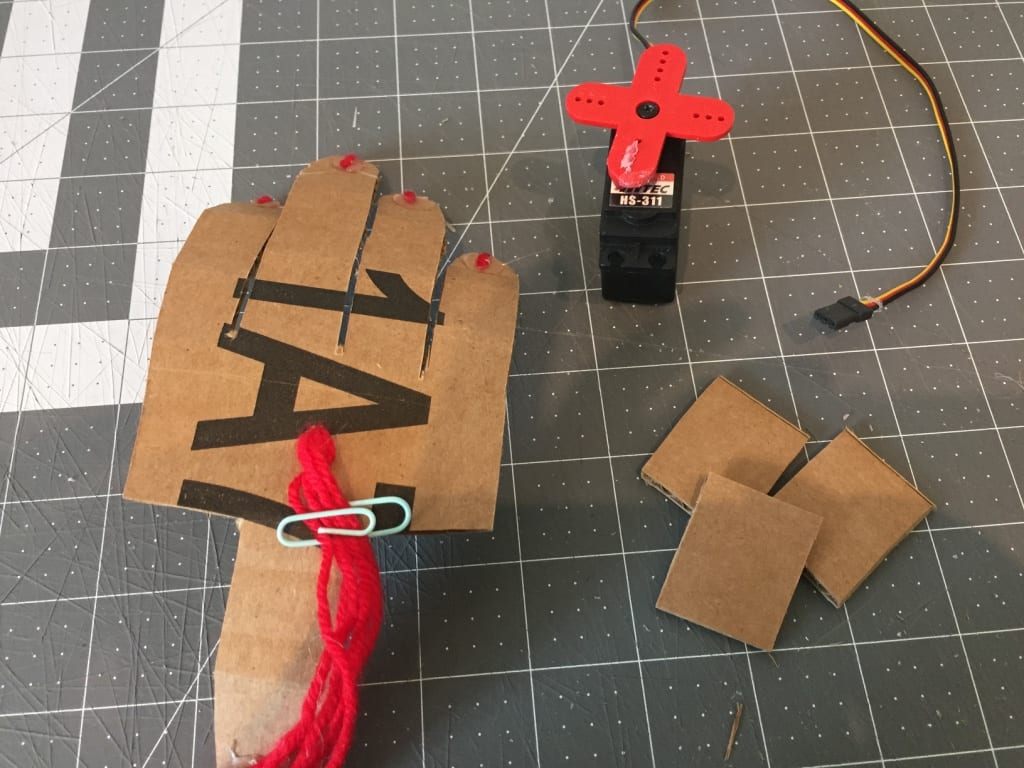
Glue the small pieces of cardboard to the bottom of the servo so that it will sit evenly on the back of the hand. Glue it in place so that the red cross is above where the yarn exits the back of the hand.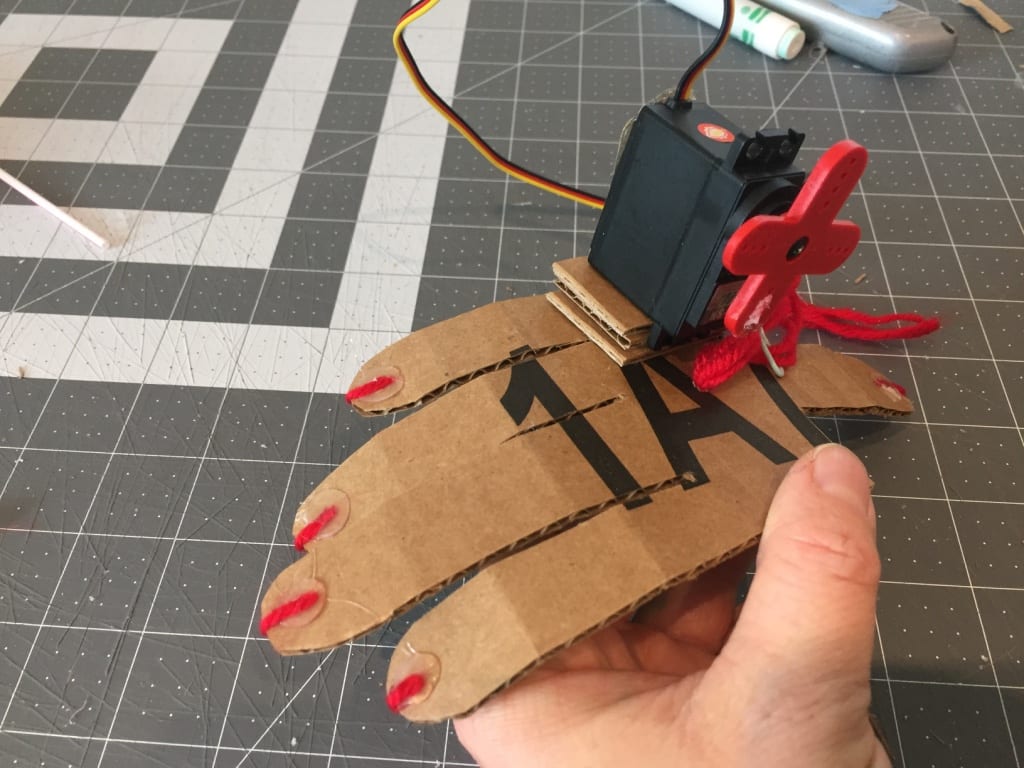
Before you go any further, use Snap! or another programming language to set your servo motor to 0°. After you have done that, glue all five pieces of yarn to the closest part of the red cross. You may also want to reinforce this connection with tape.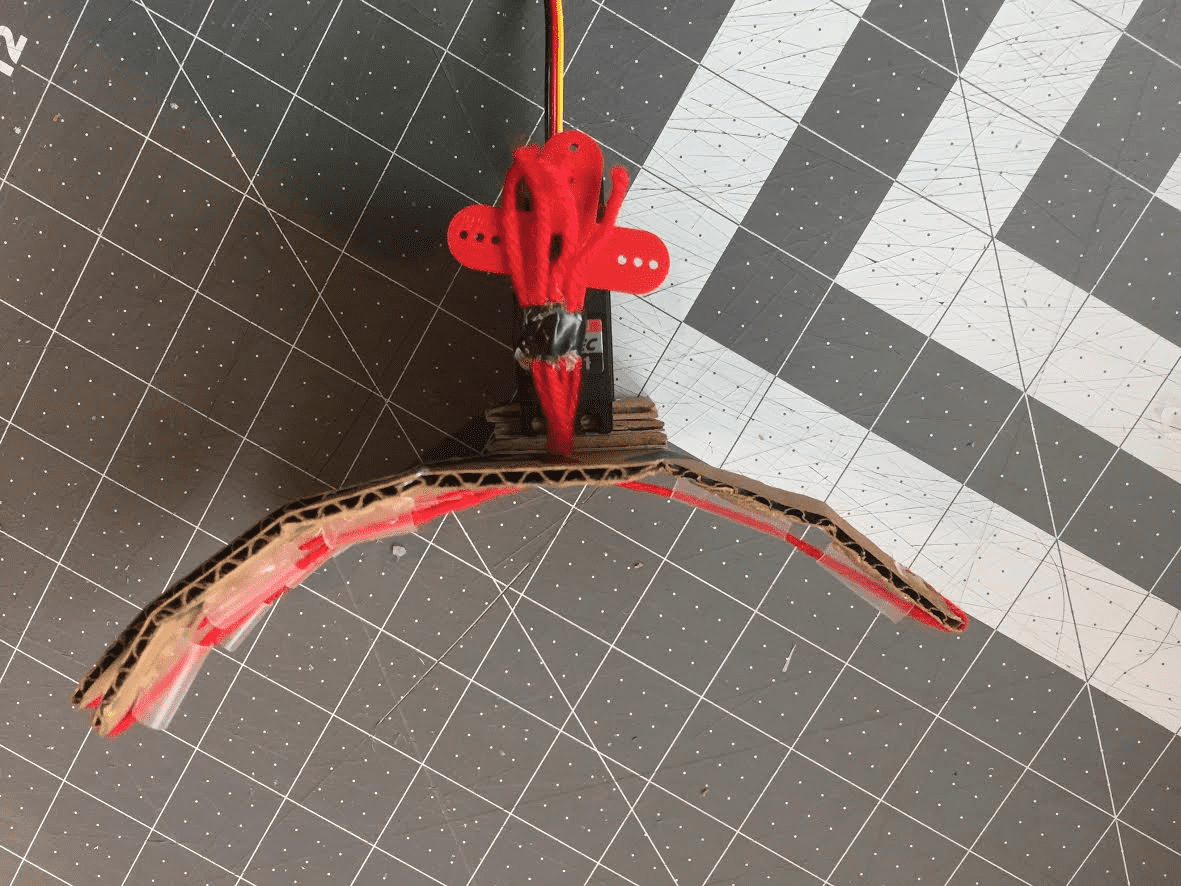
Next, experiment with moving the servo motor. What angle makes your hand close? This part may take some trial and error. You may need to detach the yarn from the servo and make adjustments.
The basic Snap! program below uses the light sensor to control the hand. When the light sensor is covered, the hand closes. Otherwise, the hand is open.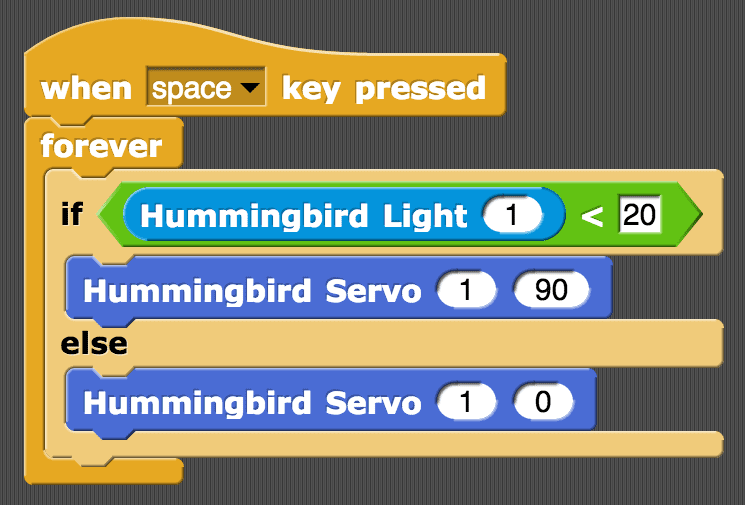
Try picking things up with your robotic hand! Can you grasp a paper cup or a foam ball? This link shows some of the grasps that we use to hold daily objects. Which grasp does your robotic hand use? How might you modify it to use another grasp?
Now that you have made a basic hand, how can you improve it? Can you make the thumb move independently of the fingers or the fingers move independently of one another? How would changing the position of the thumb change the grasp? Can you mimic how our hand uses sensors as we grasp objects? Decide how to modify your hand, then try it out!
SIMILARITIES TO A HUMAN HAND
Even though this hand is made from cardboard, yarn, and straws, it has some important things in common with human hands. The cardboard reprsents the skeleton of your hand, while the places where you scored the cardboard serve as the hand joints. The servo represents two of the muscles that bend your fingers and thumb (flexor digitorum profundus and flexor pollicis longus). You placed the servo on the back of the hand here, but in the body, these muscles are in the forearm. The yarn represents the tendons that connect these muscles to the tips of the bones of your fingers and thumb. In the robot hand, the straws keep the yarn against the cardboard so that the fingers bend when the motor pulls the yarn. In the body, tendon sheaths serve the same purpose; they keep the tendons close to the bone so that your muscles bend the joints when they contract. The tendons slide through the tendon sheaths just like the yarn slides through the straws.
Standards Alignment
COMPUTER SCIENCE TEACHERS’ ASSOCIATION (CSTA)
CSTA Standards are split into different grade levels: 3-5, 6-8, and 9-10. Working with the Hummingbird Robotics Kit meets multiple standards across these grade-level delegations.
Visit this page for a more detailed explanation of how working with the Hummingbird Robotics Kit applies to meeting CSTA Standards.

