
Activity 2: Audio Recognition
Train and Test the Audio Classifier
The first step is to open Google Teachable Machine in order to create an audio recognition model.
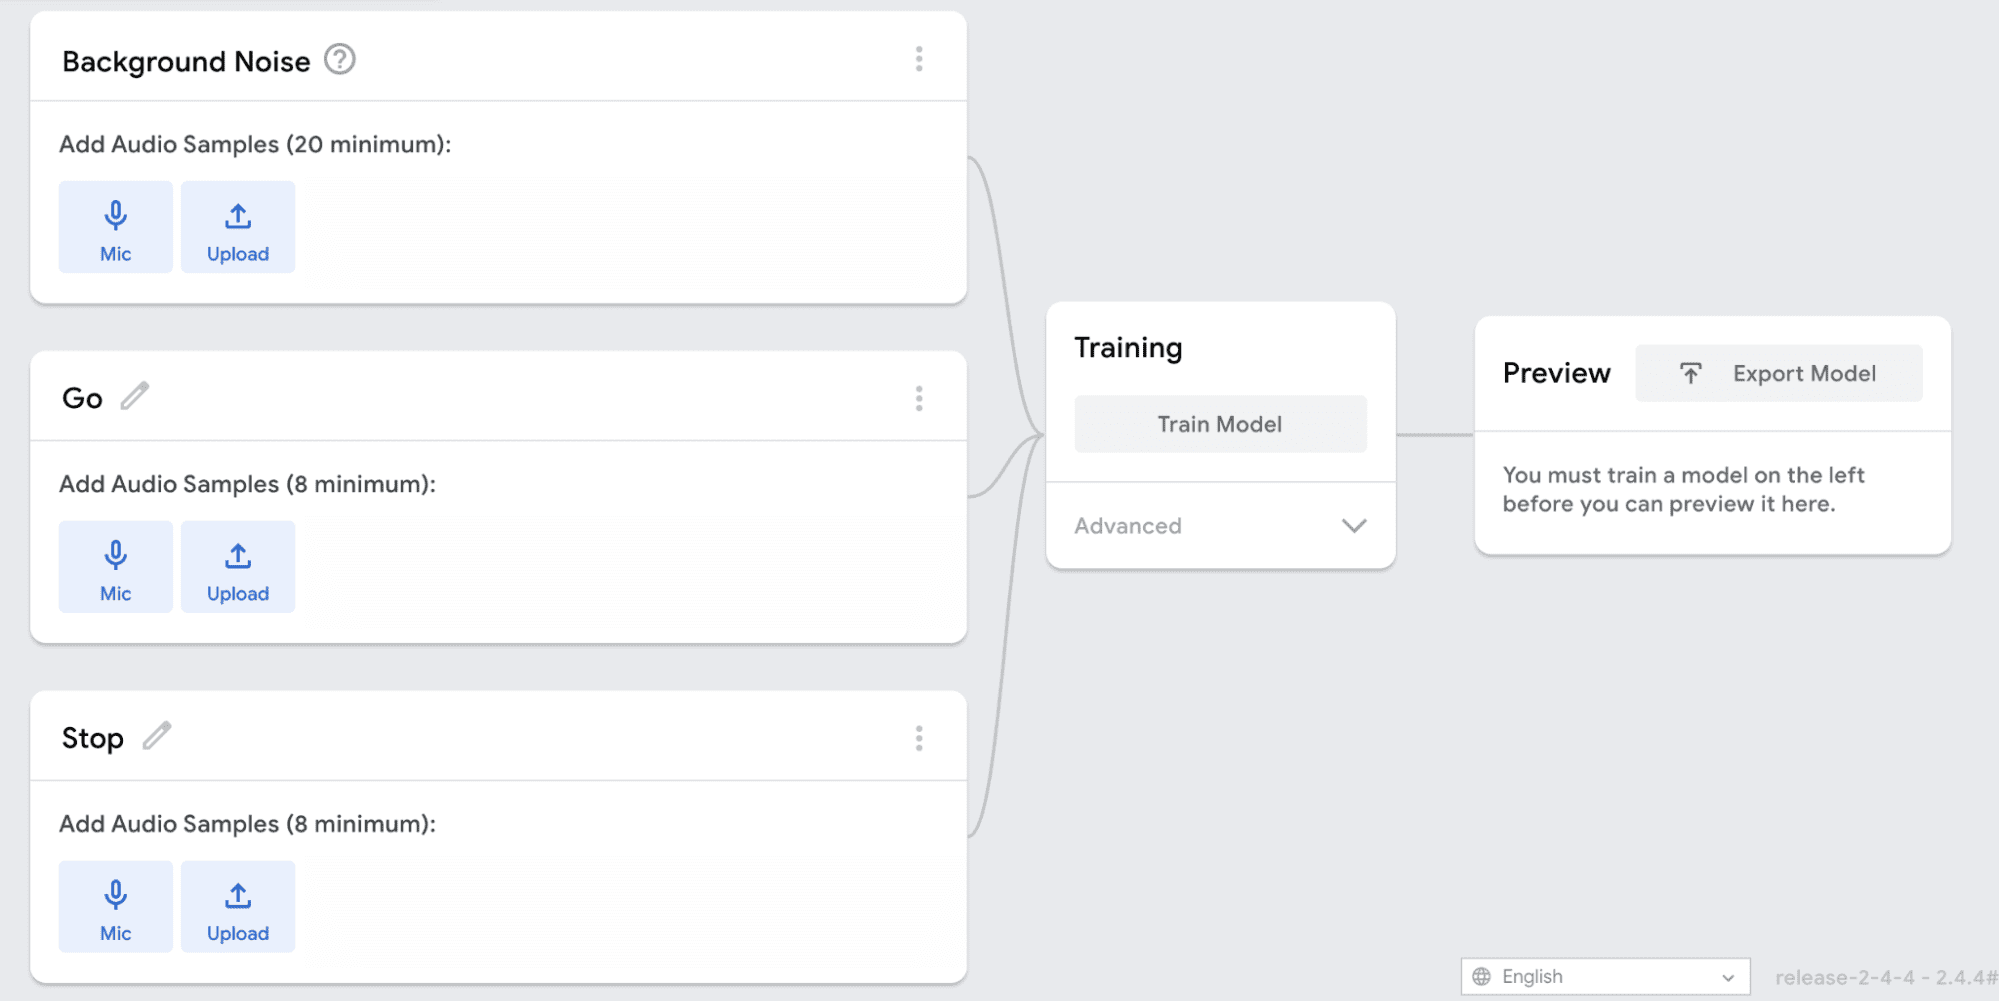
You will need to be in a quiet room for this. Decide how many classes you want and name them. Each category should be a single word. For an audio model, the first category must always be “Background Noise.” The example shown here was trained with background noise, the word “go,” and the word “stop.”
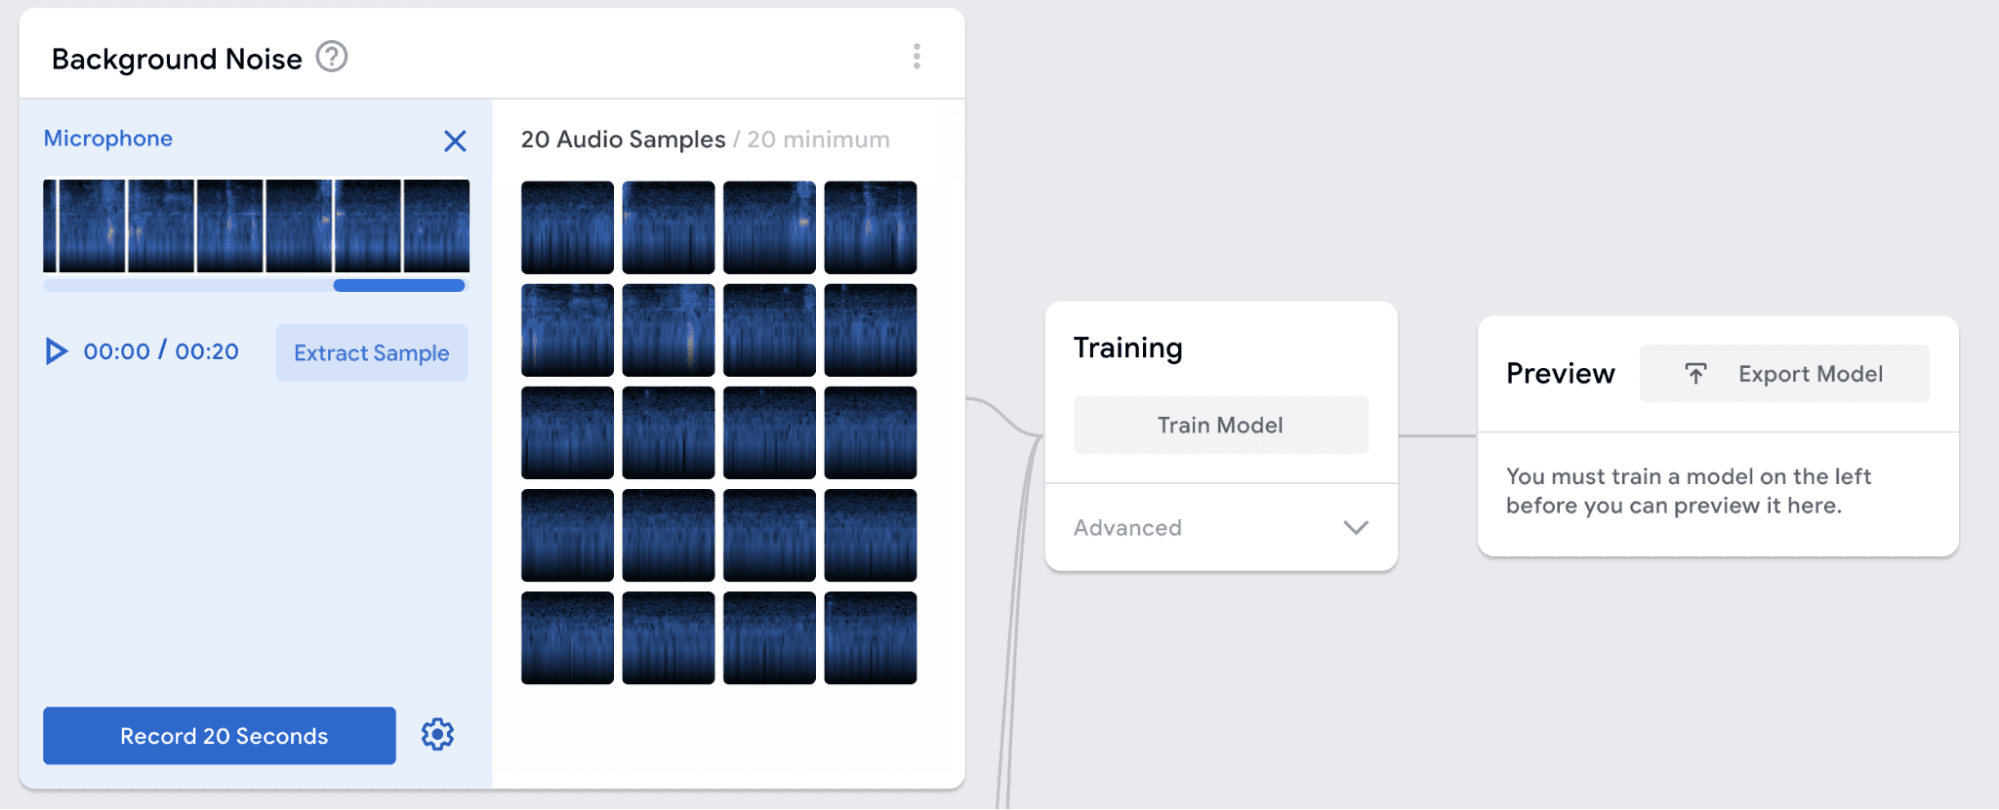
Use the microphone button to record 20 seconds of background noise. Make sure that the room is quiet while you record these samples. Then click the Extract Sample button. The screen should show 20 audio samples.

Next you will add samples for each of your classes. First, click on the settings button.
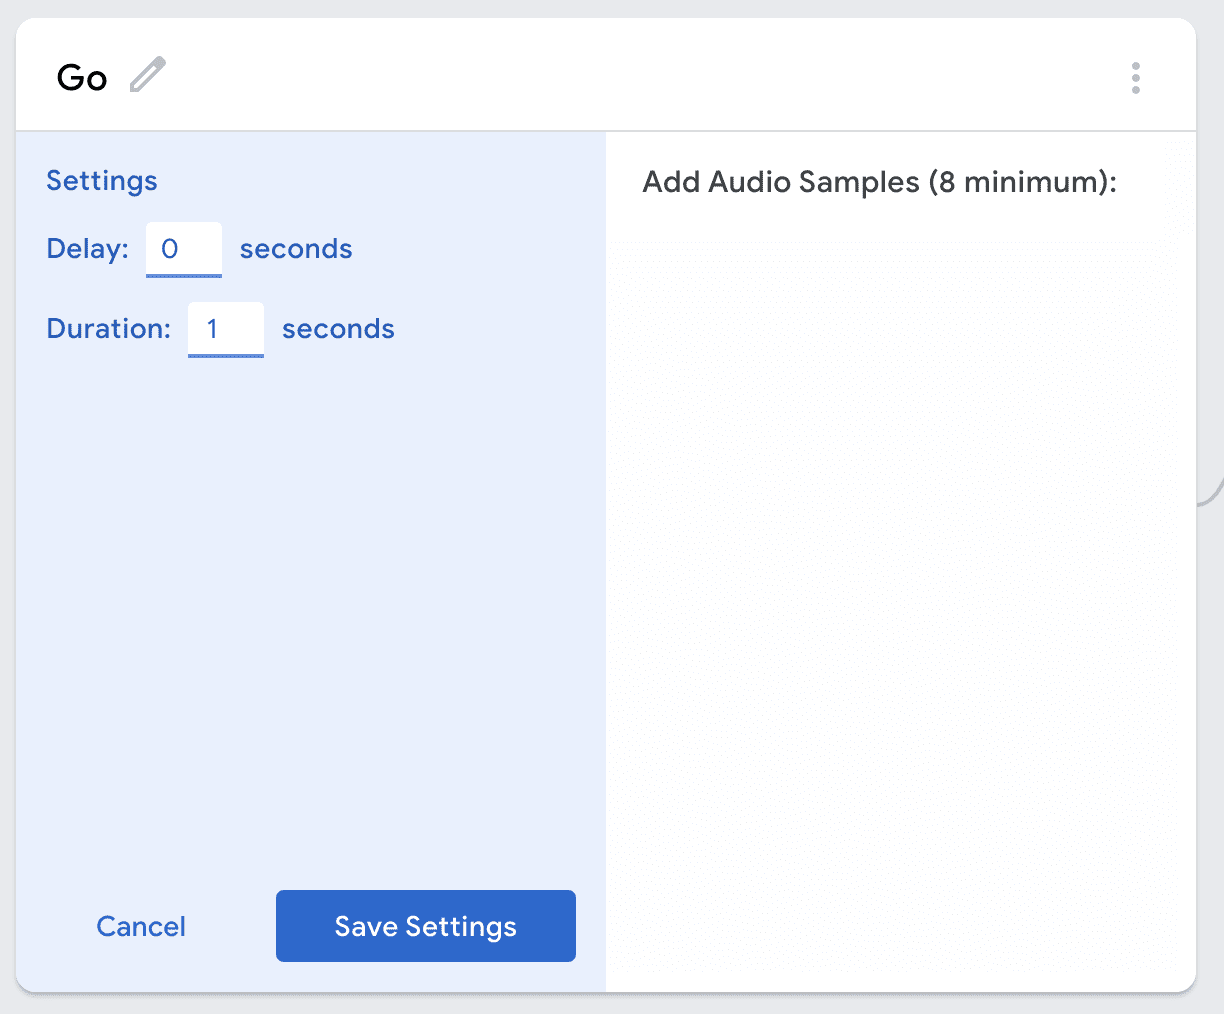
Change the duration to 1 second and then click Save Settings. Make sure you do this for all of your classes.

For each class, record yourself saying the chosen word at least eight times. After recording each file, you can use the play button to hear it. If the word was recorded clearly, click Extract Sample.
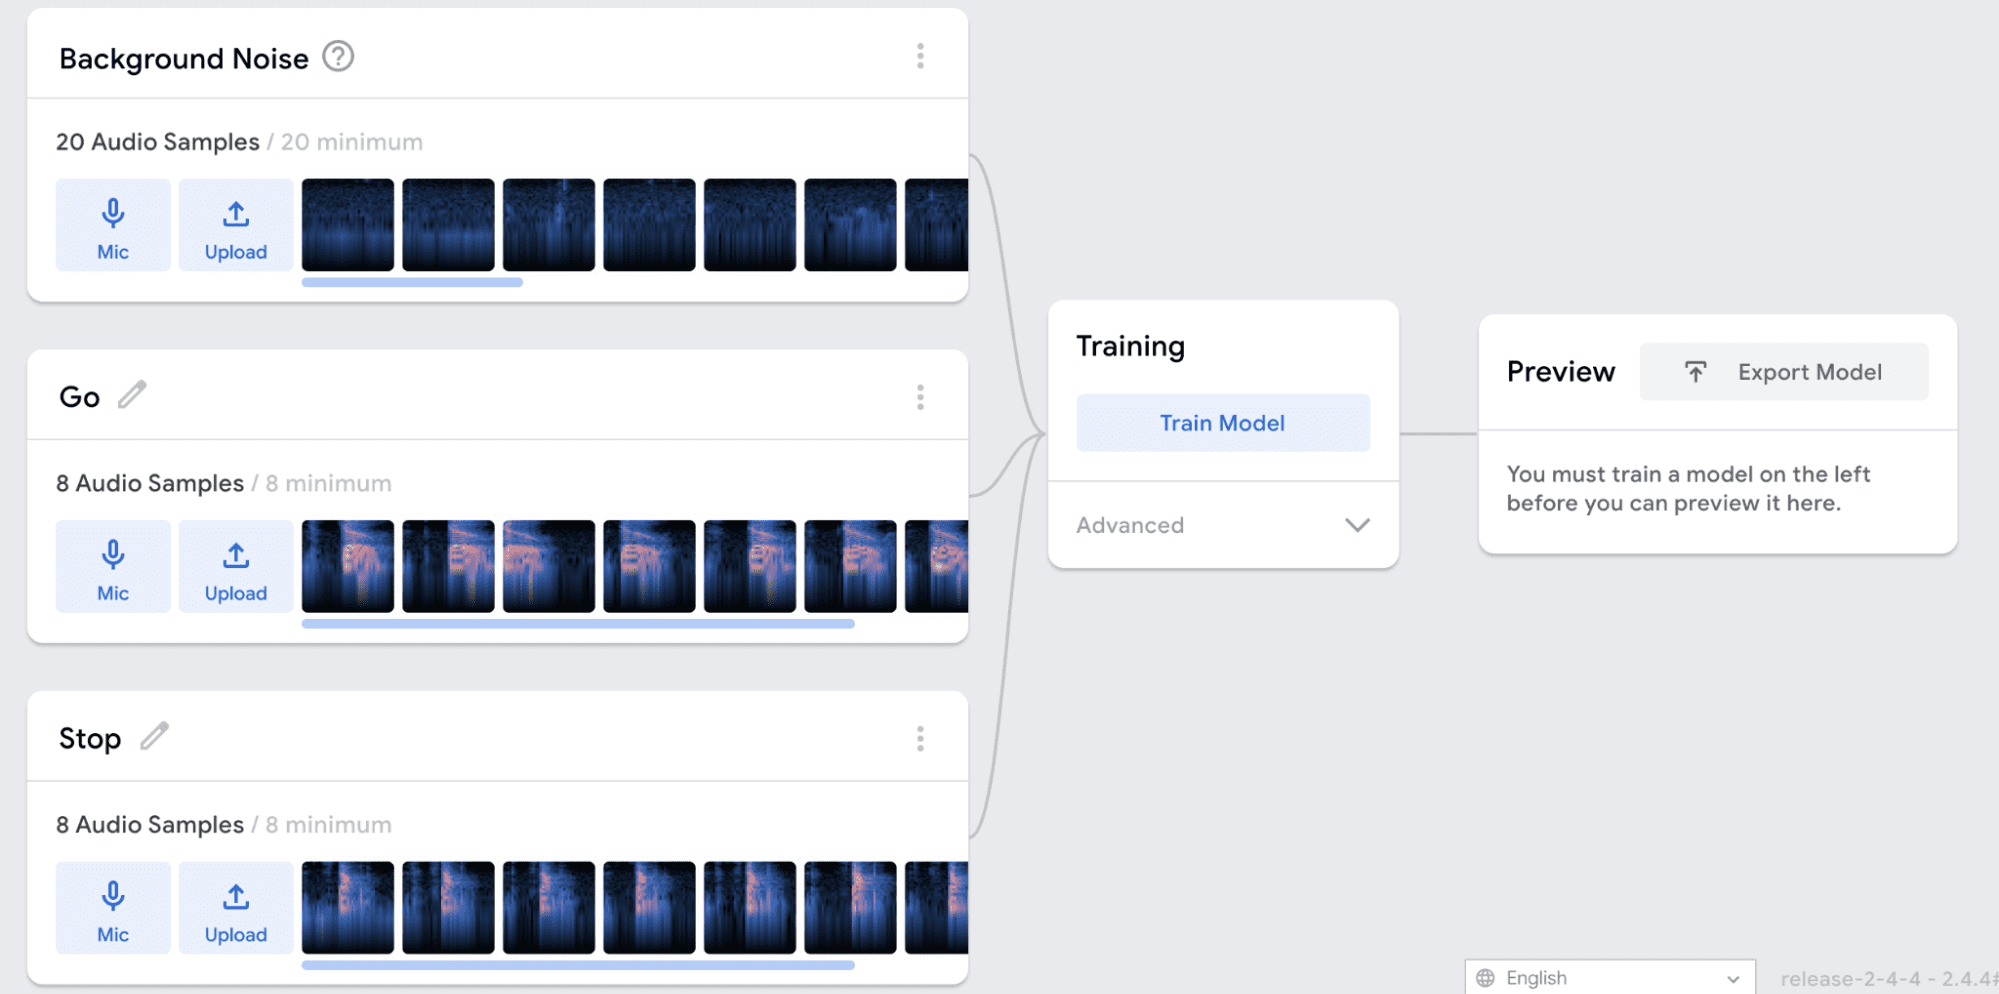
When you have finished recording data, you should have at least twenty samples of background noise and at least eight samples for each of the other classes. Once you have collected enough data, click Train Model.
The training will take about a minute. Make sure to leave the tab open while the model is training, even if your browser pops up a warning that the window is unresponsive.
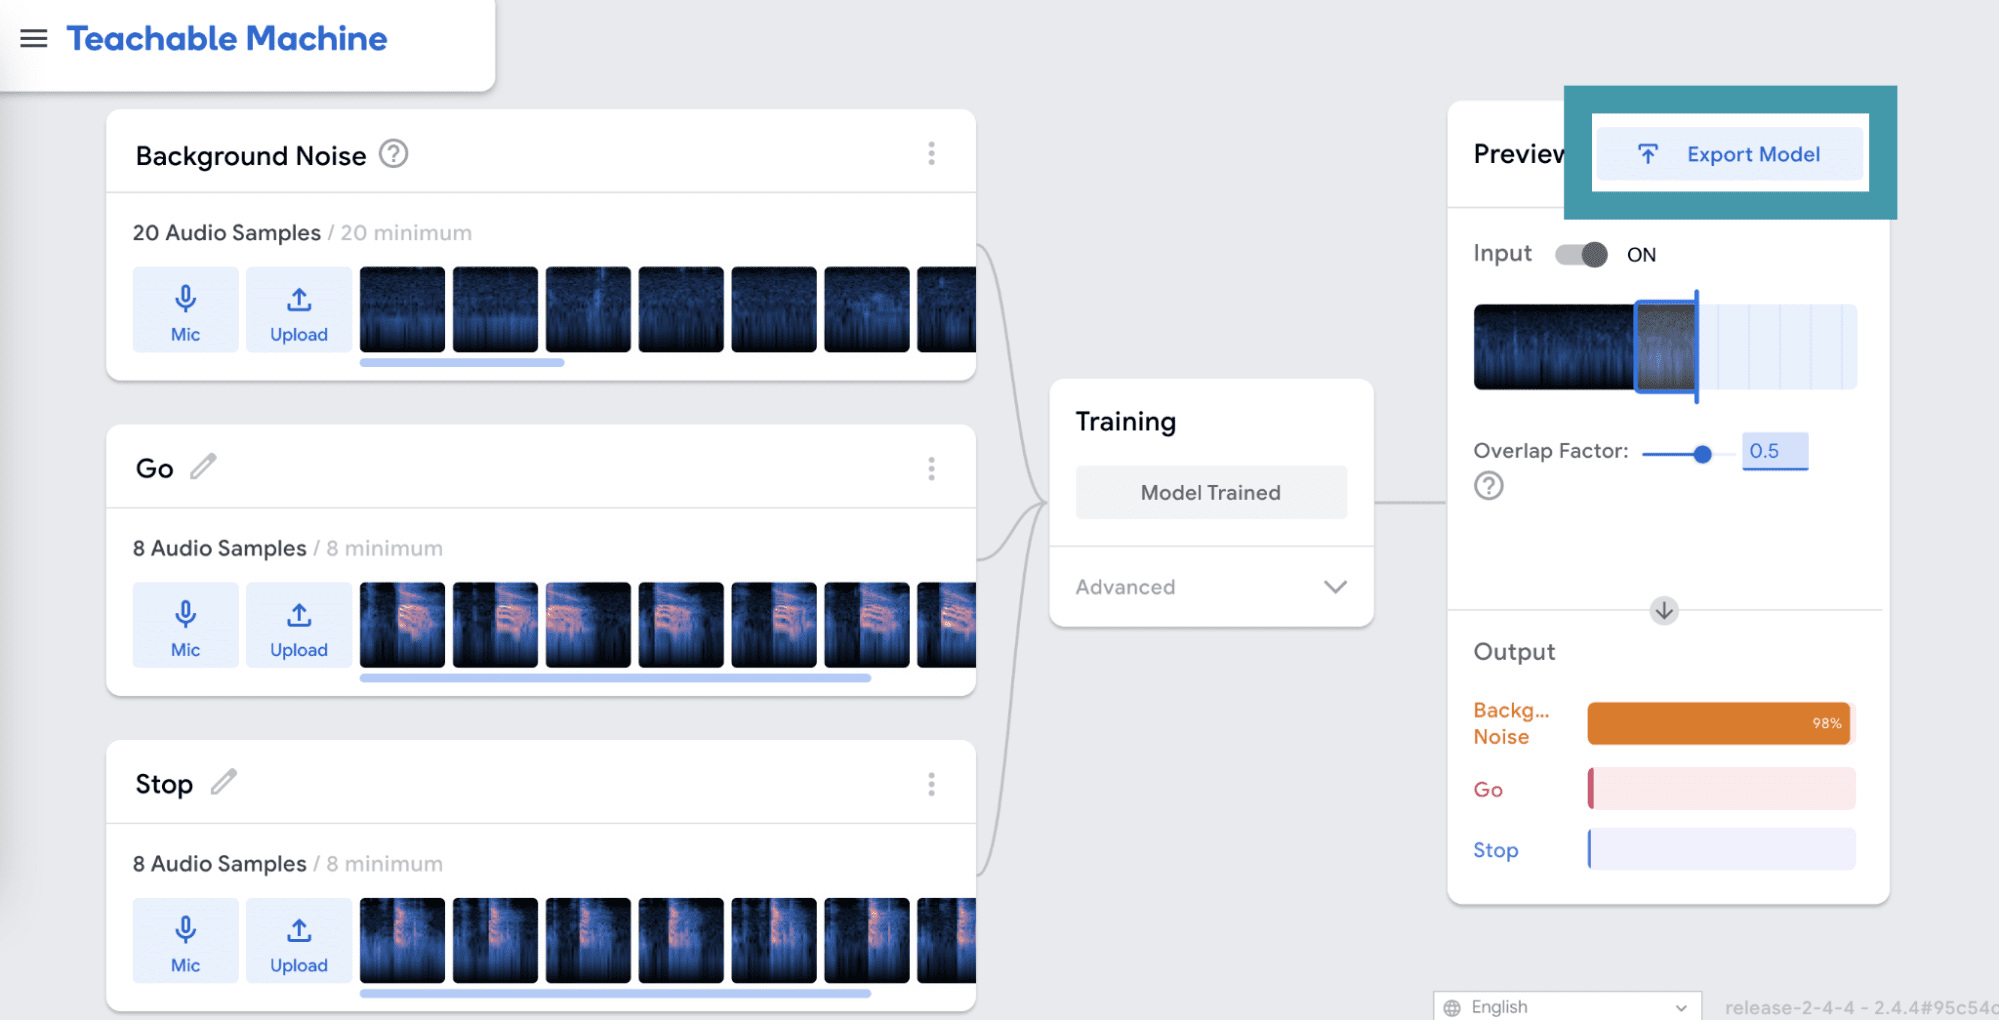
When the training is complete, you will be able to test your model in the Preview panel. Make sure that your model works the way that you want it to before moving on. If it doesn’t, you may need to add more audio samples for each class and train again. When you are happy with your model, click Export Model.
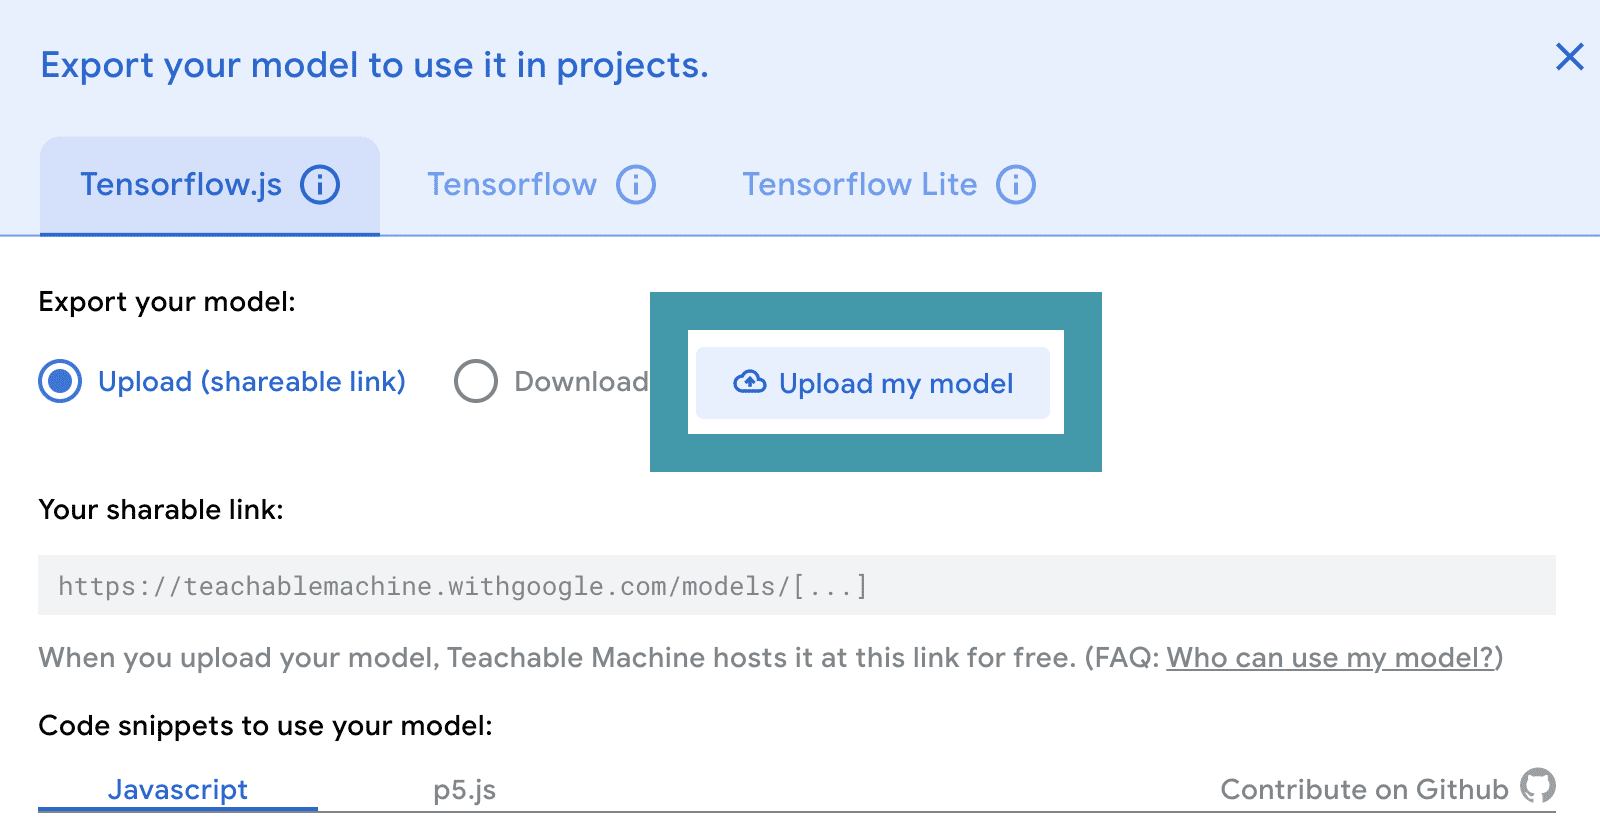
Keep all of the defaults as they are, and click Upload my model. After your model has uploaded, copy your sharable link. You will need this link to create a Snap! project with your model. After you copy the link, you can close the export window.
Remember to save your model in case you want to reference or change it later. Click on the Teachable Machine menu and either download the file or save it to your Google drive.
Using the Audio Classifier in Snap!


Using the audio classifier in Snap! is very similar to the process you used in Activity 1 for the image classifier. If you are using the BlueBird Connector, open this project in Snap! and save a copy for yourself. Then click on the Settings menu and enable JavaScript extensions.
If you are using snap.birdbraintechnologies.com, import this project into Snap!.
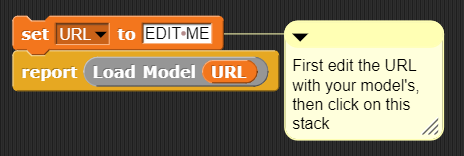
Modify the top script to set the URL variable to the link for your classifier. Then click on this stack of blocks to run the top script. You will only need to run this script once to load the libraries and the model. If the URL was correct and the model loaded correctly, you will see a message that reads “Model loaded successfully”. If this did not happen, check that the URL is correct and try clicking the stack again.
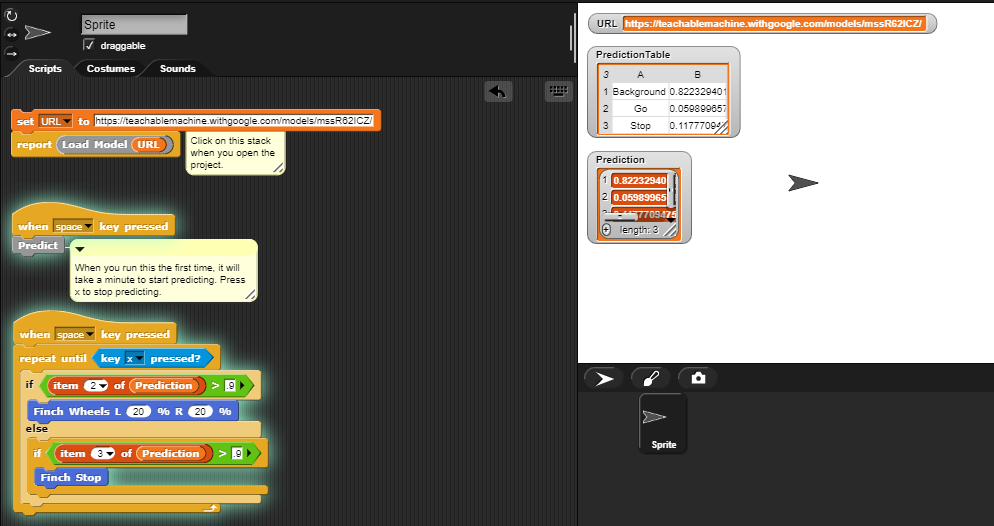
Press the spacebar to see your classifier make predictions in Snap!. Remember, it will take up to a minute for the classification to start the first time you run the script. The prediction data is in the same format as it was for the image classifier. The table on the stage lists each classification class and the probability that the current sound belongs to that class.
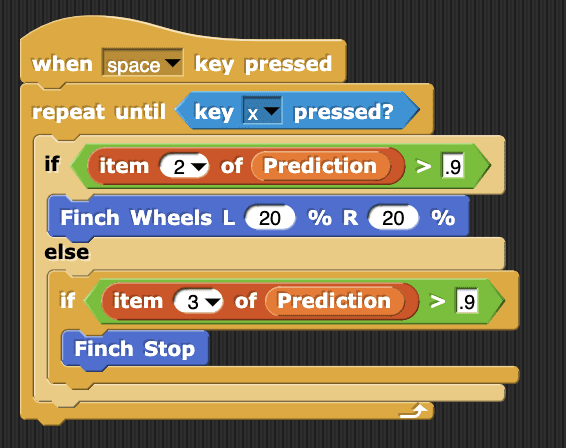
While the classifier is predicting, you can use the values in the Prediction list to control the Finch. For example, this code starts the Finch wheels when it detects the word “go,” and stops them when it hears the word “stop.”
Challenge: Write a program to make the Finch respond to each of your words. As you test your program, notice what happens if you say a word that your model does not know. What happens if a different voice says the trained words?