Activity 1: Image Recognition
Image recognition is the ability of a computer to identify objects, places, people, writing, and actions in digital images. This technology relies on artificial intelligence, specifically machine learning algorithms, which are trained using vast amounts of labeled images. Once trained, these algorithms can recognize various patterns and features within new, unseen images, ultimately allowing the computer to identify objects, people, animals, or other elements in the image. Image recognition has a wide range of applications, including facial recognition, self-driving cars, retail, and medical imaging.
A learning model is like a smart helper for computers that helps them understand and learn from information, just like how we learn from our experiences. It’s a set of special rules and steps that the computer follows to find patterns in the information it gets. After the computer learns from lots of examples, it can use what it learned to make smart guesses or decisions about new things. People use learning models to help with many different tasks, like helping doctors find the best treatments, predicting the weather, or even understanding what we say or write.
In this activity, we will create a learning model that uses image recognition to interact with different pictures. We will then create a program that makes the Finch Robot react to the different images on the screen.
*You will need access to a printer and a device with a webcam to complete this activity.
In this activity, you will train your first Image Recognition Model using Google’s Teachable Machine. Teachable Machine is a web-based tool that makes creating machine learning models fast, easy, and accessible to everyone. It may be helpful to learn more about Teachable Machine before you begin.
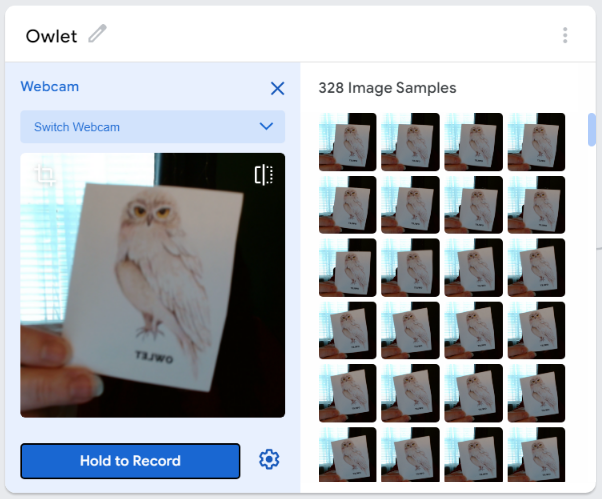
Your Image Recognition Model will use data to make predictions of what it is seeing on the screen. Below is a video of the Image Recognition Model in action. When we hold the owlet up to the screen, the model uses data to determine how likely it is that it sees an owlet, vs a hummingbird or a cardinal. This prediction is shared in the form of a number. We used that number as a variable in our code, so that the Finch robot reacted based on the image that the model predicted. So when the Finch predicts that it is seeing an owlet, it plays an Owlet sound and moves in around in a circle, like an owlet’s head might. When it predicts another character, it reacts differently – you can see this in the video when the model recognizes a hummingbird and a cardinal.
Ready to create your own Image Recognition Model? Let’s get started!
1.Open Google Teachable Machine in a new tab or window. This tab will need to stay open and visible on your screen while you work. You will use Google Teachable Machine to create your image recognition model.
2. Print out the Image Recognition with the Finch printable. Cut out the birds. If you’d like, attach each bird to a popsicle stick, pencil, or anything else you can use to hold them up in front of the camera.
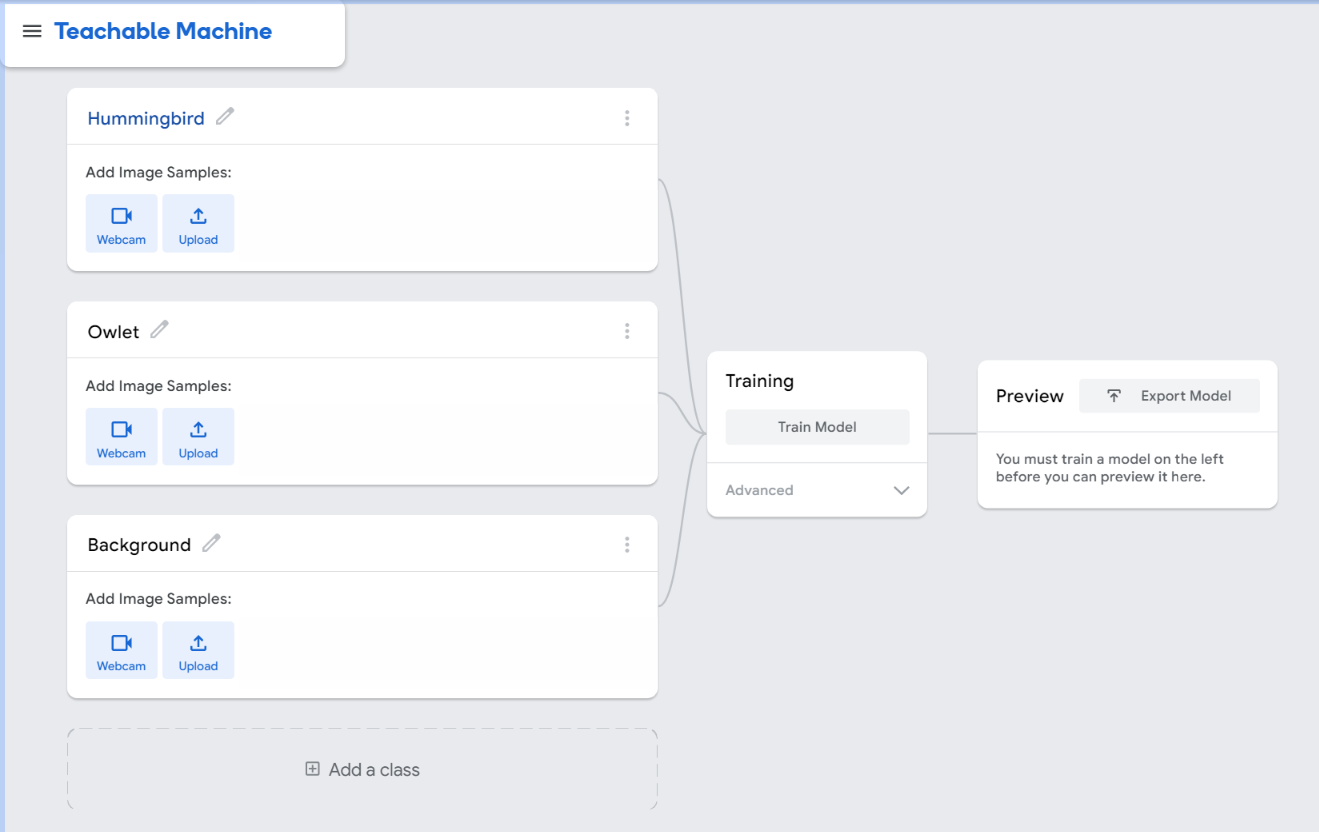
3. A ‘Class’ when working with machine learning is a group of things. Your image recognition model will allow your system to use predictions to tell the difference between different classes. Each character is its own class. In our image recognition model, the model will predict when it sees different birds.
Go to your Teachable Machine tab and breate three different classes in your image recognition model. To add a third class, click the “Add a class” button. Name one Hummingbird, one Owlet, and the other Background.

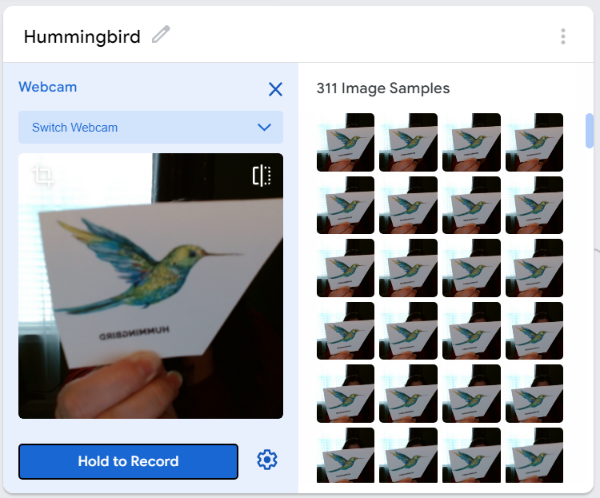
4. Next, we will collect image samples to train the model. Your model will use these images to learn how to predict which class it is seeing. Google Teachable Machine takes image samples very quickly. Aim for about 300 pictures for each class, which should only take a few seconds.
Grab your Hummingbird and click on the Hummingbird class. Use the webcam to take image samples. To do this, click Webcam, center your bird within the frame, and click and hold down the Hold to Record button. As you do this, the image samples will appear to the right. Try to move the bird around slightly so the camera gets a variety of angles.
To delete images from a class, click on the image and then the Trash icon.

6. Now, take your birds and your body out of the webcam frame. Take pictures of the empty frame in your Background class. This will allow your model to recognize your background, so it does not mistake it for one of your other classes.
What might happen if you train your model without a separate class for the background?
7. Once you have added image samples for each of your classes, your model should have the data it needs. Click Train Model.
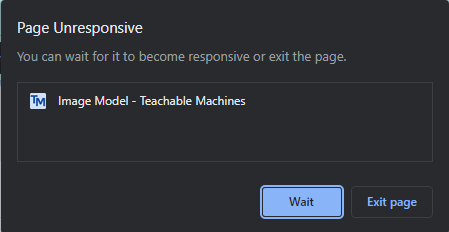
Training the model will take a few minutes. It may take longer depending on your device and internet speed. The tab must stay open and visible while the model is training. Your browser may pop up a warning that the window is unresponsive – ignore this by clicking “Wait” and allow the machine to keep working.

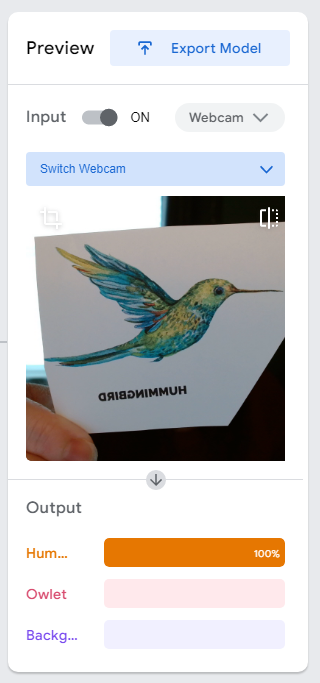
8. When your model is finished training, your screen will say Model Trained, and a Preview panel will appear on the right side of the screen. Now, you can test your model.
Hold up your Hummingbird to the camera. If the Hummingbird class has the highest percentage, that means that your model recognizes when you are holding up the Hummingbird. Check that the prediction is correct for your Owlet, and your background.
If your model does not recognize the classes the way you would like it to, you may need to add more or different image samples for each class and train again. You can train as many times as you want.

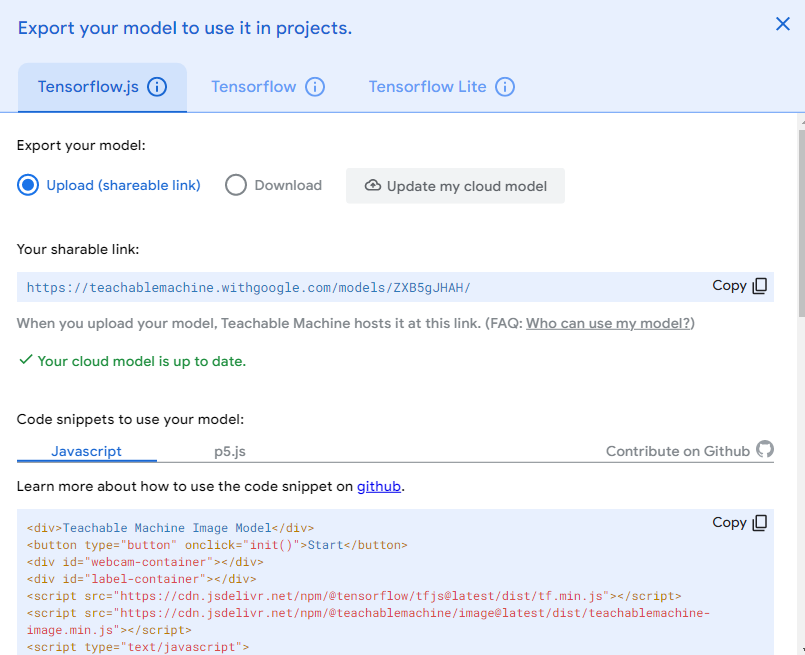
10. After your model has uploaded, you will see a sharable link highlighted in blue. You will need this link in the following steps to create a Snap! project with your model and complete this activity. Copy the sharable link. After you copy the link, you can close the export window. (You can always open the window and access the link again later.)

11. You can save your model to reference or change it later by saving it to your computer or to your Google Drive. To do this, click on the Teachable Machine menu and select the option you would like.
1. Open snap.birdbraintechnologies.com in a new tab. Connect your Finch Robot to Snap!. Click here for instructions on how to connect your Finch Robot to Snap!.
2. If you are using the snap.birdbraintechnologies.com link above, press the button below to download the image recognition program file. Snap! needs this file to run your Image Recognition program.
After downloading, import the file into Snap! by clicking the button with the Paper on it, selecting Open, selecting Computer, and uploading the file. When the file uploads, you will see code appear on your screen in the Snap! window.
Download Snap! Image Recognition Project
If you are using the BlueBird Connector instead of snap.birdbraintechnologies.com, open the project in Snap! with the following button and save a copy for yourself.

4. At the top of your Snap! window, there is an orange “set” block. There is a space in this “set” block to place a variable, and in this program, the variable is the URL for your model (the shareable URL that you copied from Google Teachable Machine). To add your URL, click into the box that says “EDIT ME”, delete that text, and paste your link.

5. Once your URL is pasted into the variable space in the Set block, click the block to run it. The blocks will appear to glow when they are clicked. You will only need to run this script once.
Watch the screen. If the model loaded correctly, you will see a message flash that reads “Model loaded successfully”. The URL will also update in the Snap! stage on the right. If you do not see this message, check that you pasted the URL correctly and try clicking the stack again.
6. Your program is ready to run your model! This program is called a classifier, because it organizes data into one or more classes – in this case, the classes that you created earlier. Press the space bar to see your classifier make predictions in Snap!. It will take up to a minute for the classification to start the first time you run the script.
When it starts, the Snap! stage will show you an image of what the webcam sees, and a table of prediction information. The table lists each classification class and the probability that the current image on the webcam belongs to that class. A probability close to 1 tells you that the image probably belongs to that class, while a probability close to 0 tells you that the image probably doesn’t belong to that class. For example, if you hold up your Hummingbird, the probability of the “Hummingbird” class is greater than 0.9, while the probabilities of all other classes are very small.
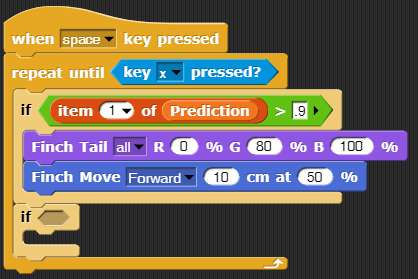
7. Now that you know the probabilities that correspond with each class, you can use that information to control the Finch’s actions. You can use the probabilities to make the Finch perform certain actions when each class is detected.
For example, this code moves the Finch forward and lights up the tail LEDs when there is a high probability that the webcam image is in class 1. So if class 1 was the label for the Hummingbird picture, our Finch would move forward whenever it saw Hummingbird.

Now that your model can predict what type of bird it sees, we can use that data to control the Finch Robot’s actions. How will you have your Finch Robot respond to your different classes? Use the model that you just created as your beginning code – then modify and create!
Try these challenges:
- Modify the program to make the Finch respond to the Owlet in a different way than it responds to the Hummingbird.
- Modify the program to make the Finch move in a way that mimics how Hummingbirds and Owlets move in nature.
- Modify the program to sing a different birdsong when it recognizes each bird.
- Combine movement, sound, and lights to create a different reaction for each bird.
Here are some tips to make editing your program quick and easy:
- Right click and select Duplicate to make a copy of any of our sample code, and pick it up. Then you can edit that code!
- To edit which item your code is responding to, highlight the item number, delete it, and type in your new number. Do this instead of attempting to select from the drop-down
As you test your program, notice what happens if the webcam sees an image that is not similar to something in your training data.
Ready for a different challenge? Go back to your Image Recognition Model on Google Teachable Machine and train more classes to recognize the other birds from your printable: the Finch, Eagle, and Cardinal. Repeat the steps above to upload this new program into Snap!. Now, you have even more classes to influence your Finch robot’s behavior!
Try these challenges:
- Modify the program to make your Finch Robot do a happy dance when it sees a Finch bird.
- Modify your program to make your Finch turn red when it sees a Cardinal.
- Modify your program to make your Finch move to different areas in the room when it sees different birds.
- Modify your program to move or behave a certain way when it does not see a bird.
What other challenges can you think of?
Congratulations, you’ve trained your first Image Recognition Model, and used it to control your Finch Robot! Now you can create your own Image Recognition Models, and use them in new and exciting ways. Looking for some inspiration? Image Recognition with Finch Challenge Cards are coming soon!

